
Use your browser’s Print command to save a personal PDF or print these chapters. Commands and tables can be scrolled on screen. Both core choices are included, so follow the settings for the branch you choose.
Two ways to build
Choose your mobile core
Both paths use the same ideas: a licensed radio, your own subscriber credentials and a private LAN. Start with one path and keep its settings together.
Open5GS
A complete public EPC on one Ubuntu PC. Follow the package installation, matching configuration extracts and first-subscriber steps.
Follow the Open5GS pathVectorCore
Build the public VectorCore MME, HSS and serving gateway, with Open5GS providing the packet gateway. Follow the separate host plan, source builds and provisioning steps.
Follow the VectorCore pathThe first build is LAN only. It does not need IPsec. The remote-site chapter explains when encrypted backhaul is useful.
Chapter 01
Build your own mobile network
Start with one computer, one licensed indoor radio and one test phone. Learn what each part does, make a secure 4G data connection, then grow the system one step at a time.
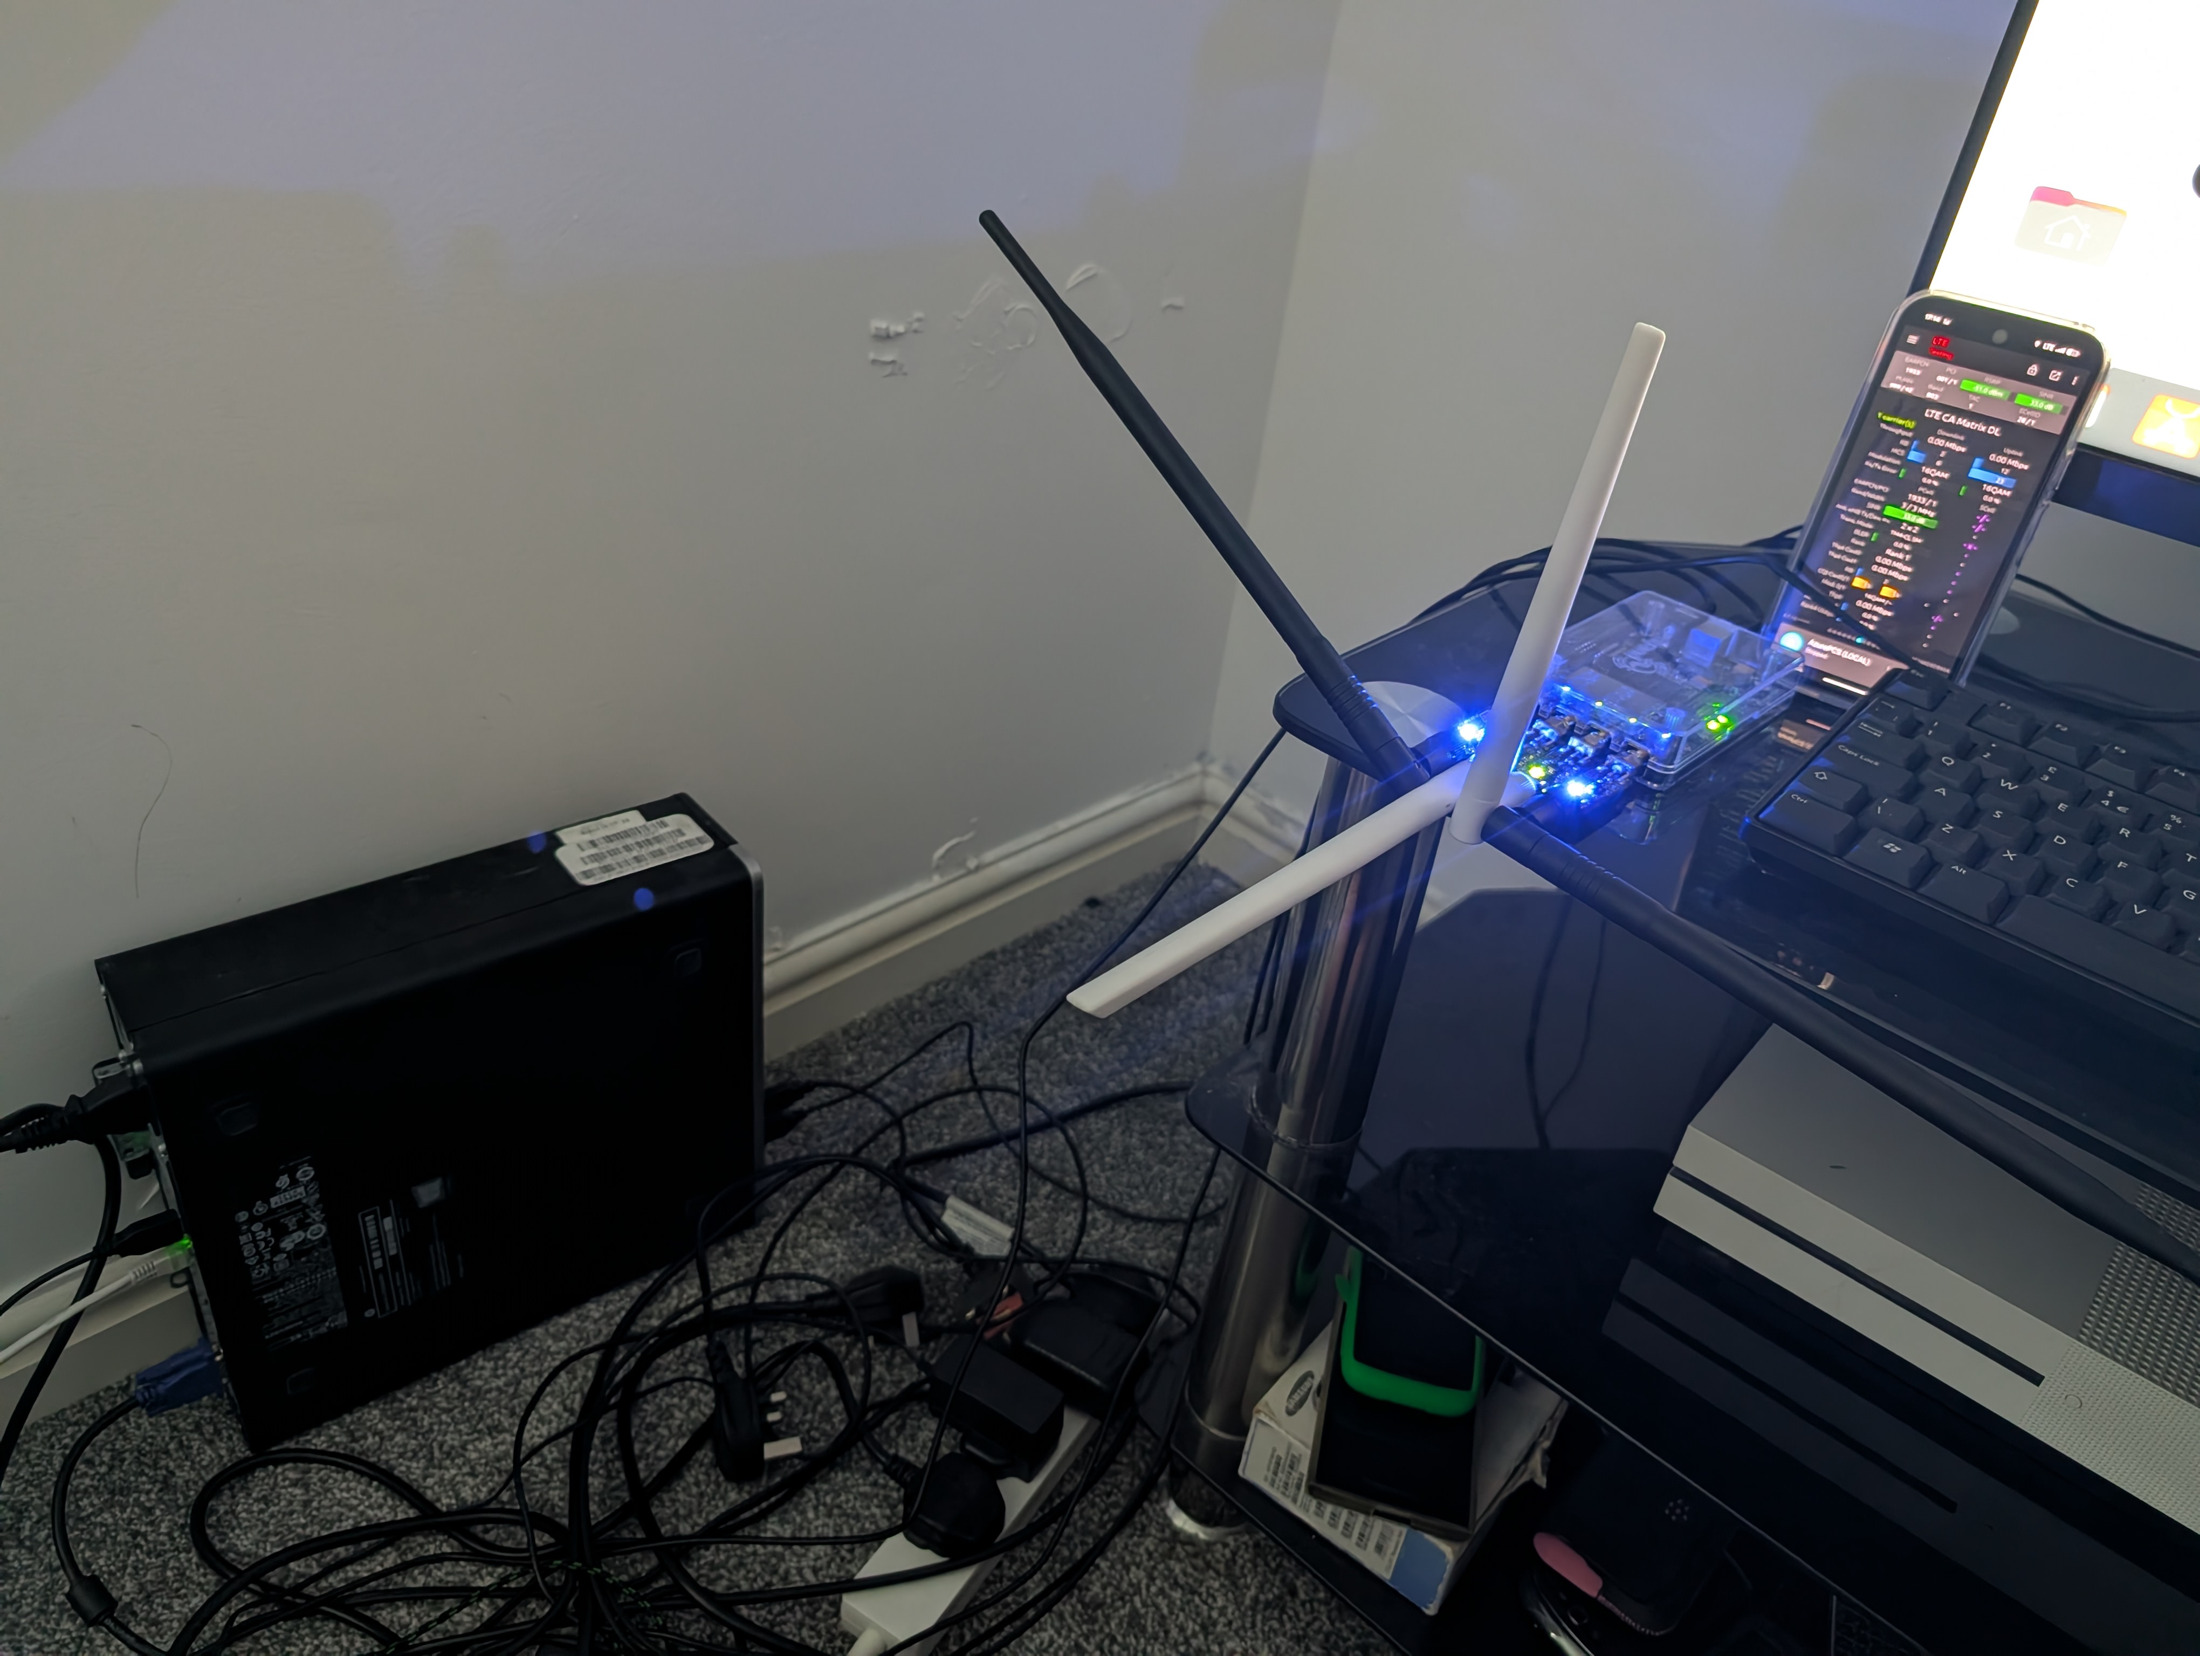
You are welcome here
You do not need to arrive knowing telecoms. This guide starts with an ordinary computer and explains the new words as they appear. Take one chapter at a time. Keep a notebook, save a working configuration before changing it and treat each test result as a clue. Asking a basic question is part of learning.
The first build is a private LTE network. LTE is the technology commonly called 4G. Your own radio connects a phone to software on your Ubuntu PC. Your own SIM credentials decide who can join. Your existing broadband supplies the Internet connection. You are building a small mobile network, rather than a Wi-Fi access point.
What you will build
- Plan an isolated network with separate management, radio and phone addresses.
- Choose equipment that supports the exact licensed UK frequency and power.
- Install Ubuntu and a public Open5GS mobile core.
- Keep administration private and allow only the traffic the network needs.
- Add a programmable USIM or a properly provisioned eSIM.
- Configure a Baicells LTE base station and connect a test phone.
- Check Internet access, privacy boundaries and recovery after a restart.
- Add an encrypted tunnel for a remote radio site, then explore voice, messaging and ongoing operation.
The main worked example uses Ubuntu Server 24.04 LTS on an x86-64 PC, an Ethernet-connected LTE Band 40 eNodeB, a private PLMN of 999/99, one Internet APN and IPv4. Two wired interfaces keep the radio separate from the home network. Choose the all-in-one Open5GS path or the separate VectorCore path linked from the chapter list. The main Open5GS configuration follows the 2.8 configuration family. Record the package version you actually install because repositories change.
Three milestones
| Milestone | What success means | What to learn next |
|---|---|---|
| A local data network | One authorised phone attaches, receives a private address and browses with Wi-Fi off. | Protect, monitor and recover the working lab. |
| A secure remote site | The radio reaches the core through an authenticated encrypted tunnel, with no public S1 exposure. | Routing, tunnel identity, MTU and site isolation. |
| Voice and messaging | Two compatible phones register to IMS and complete controlled call and message tests. | IMS identities, DNS, policy, media and service responsibilities. |
A working data connection does not automatically provide VoLTE, SMS, roaming, public telephone numbers or emergency calling. Those are additional engineering and service projects. The voice chapter explains the dependencies and the checks that prove each part works.
How to follow the examples
Read a whole step before using its commands. Commands are entered in Ubuntu's Terminal. A line beginning with sudo asks for administrator rights. Your password will not appear while you type it. Do not type a leading dollar sign from another tutorial. In an editor, Ctrl means hold the Control key while pressing the named letter.
Addresses and names in this guide are examples. Replace interface names with the names on your PC. Replace the home management subnet if yours differs. Example public addresses in 192.0.2.0/24 are reserved for documentation and cannot be used as real Internet endpoints. Never copy Lodestar's subscriber identity, private addresses or credentials.
Configuration blocks described as extracts belong inside an existing file. They are not complete replacements. YAML uses spaces for indentation. Tabs, duplicate top-level keys and removing unrelated sections can prevent a service from starting.
A realistic first project
Plan several sessions for the first build. Licensing and equipment delivery can take longer than the software work. Complete the Ubuntu and core chapters while the transmitter stays silent. First make the local system work on a bench. Add a remote site only after the local tests pass. Add IMS after reliable data, because faults are much easier to locate when one layer changes at a time.
Use the equipment checklist to collect quotations. Include annual spectrum fees, broadband, electricity, replacement parts and your own time. A refurbished PC can be a good starting point, but buying the wrong radio or a locked SIM usually costs more than checking compatibility first.
What we checked
This guide was prepared on 1 November 2026 using a read-only SSH review of Lodestar's security gateway, mobile core and IMS edge, plus the primary documentation linked throughout the chapters. The production review confirms the architecture and running software roles. The public Open5GS and VectorCore builds below are educational reference designs. These example installations have not been completed from scratch or tested over the air on a new Baicells as part of this publication.
Model-specific menus, handset behaviour and your issued radio licence must be checked on your own equipment. Each chapter gives an expected result and a reason to stop if it is missing. The final chapter compares the audited Lodestar deployment with the public Open5GS and VectorCore paths. Running production binaries are not proof of which public commit was deployed.
Chapter 02
Choose the equipment before you buy
A private mobile network needs a computer to run its services, a radio to reach phones, and subscriber credentials that belong to your network. The purchase checklist matters because similar-looking radios and phones can support different frequency bands and software features.
Understand what each box does
The radio is the part that transmits and receives mobile signals. In a 4G network it is called an eNodeB, often shortened to eNB. Your phone is called user equipment, or UE. The core is the collection of software services that checks a subscriber's credentials, assigns an address to the phone and carries its traffic to an allowed destination. The security gateway protects the connection between a remote radio and the core. An IMS system adds the services needed for mobile voice. These jobs can live on separate computers or, for a small lab, on separate virtual machines on one suitable host.
With a commercial Baicells eNodeB, you do not also need a software defined radio merely to run the core. A software defined radio is an alternative radio route with a different installation and tuning process. Start with one radio and two test devices. This makes it possible to prove both data access and calls between subscribers without buying a larger deployment before the basic design works.
Your first target should be a small, controlled installation. Coverage area, traffic load, redundancy and voice features all change the equipment needed. A computer that is adequate for learning is not automatically adequate for an organisation that relies on its network throughout the day.
Build a practical shopping list
| Item | What to look for | Why it matters |
|---|---|---|
| Ubuntu computer | An x86-64 PC that can run a supported Ubuntu LTS version, with reliable Ethernet and an SSD. | It hosts your core services and, if resources permit, the security gateway and IMS virtual machines. |
| Compatible LTE radio | The exact Band 40 hardware variant, supported firmware, full administrative access and support for your own external EPC. | The product name alone does not establish that it will work on your licensed channel or with your chosen core. |
| Radio power supply | The injector or switch specified for that exact radio and its power budget. | Incorrect voltage or incompatible passive PoE can damage equipment. |
| Network equipment | A router or firewall, a small managed switch when you need VLANs, and good Ethernet cables. | You need separate management, radio and subscriber traffic paths with clear access rules. |
| Subscriber credentials | At least two prepersonalised USIMs, or a suitable commercial eSIM provisioning service. | The core must know the credentials for each subscriber. |
| Test devices | Two unlocked devices with the correct LTE band. Obtain evidence of private network and IMS compatibility for the exact model and firmware. | Radio band support and successful voice service are separate questions. |
| Card tools, if needed | A supported PC/SC card reader and a good SIM adapter. | You only need programming tools if you will inspect or personalise removable cards yourself. |
| Installation accessories | Suitable mounts, weather protection, grounding and surge protection specified by the equipment supplier. | An outdoor installation needs a physical design as well as software configuration. |
| Power protection and backups | A UPS sized for the equipment you want to keep running, and encrypted off-host backups. | Power interruptions and failed disks should not destroy your subscriber database or configuration. |
For a small learning installation, a practical starting point is a modern four-core computer with 16 GB of RAM and a 256 GB SSD, allowing room for several virtual machines, updates and logs. This is a planning suggestion, not a measured capacity guarantee or a minimum requirement from Open5GS. Increase resources if you add more services, retain large packet captures or expect sustained traffic. Use the Ubuntu version supported by the specific software release you choose. Save that release information with your build notes.
Check the exact Baicells before paying
The Baicells Nova227 product page lists Band 40 within its product family, channel widths of 5, 10, 15 and 20 MHz, integrated antennas and GPS, one Gigabit Ethernet port and IEEE 802.3at PoE+. It also says features vary by model or region. These are useful purchase questions, not proof that every second-hand Nova227 has the required radio hardware.
- Ask for a photograph of the complete model and frequency label, plus the hardware revision.
- Ask the seller to confirm operation over the exact frequency range and channel width that your licence permits.
- Ask for the installed firmware version and a vendor-supported route to compatible firmware.
- Obtain written confirmation that you can configure your own external core, including PLMN, tracking area, MME address and the necessary security gateway settings.
- Confirm that you will receive administrator access and that the unit can be released from any previous operator account or remote management arrangement.
- Check what is included: power supply, injector, mounting kit, connectors and any separate timing antenna.
- Ask the vendor to confirm the required timing method and the installation conditions for it.
- Agree a return route if the unit does not match the specification.
A Band 48 radio is not a substitute for a Band 40 radio merely because both use LTE. The Baicells configuration guide describes band selection as dependent on the hardware board. The guide currently linked from the Nova227 page is a shared guide that describes a different dual-carrier model, so treat menu labels as firmware-dependent and obtain the correct manual for your unit.
Plan the cables, timing and first power-up
Draw the cable route before connecting anything. Label the management connection that lets you administer the equipment, the path from the radio to the security gateway, and the path from the core to the internet. Write down which switch port serves each purpose. If everything shares one physical switch, use the intended VLAN design and verify it before adding subscriber traffic. A dedicated management port or network makes accidental exposure easier to avoid.
Ask the radio supplier about synchronisation. Accurate computer time is needed for logs and certificates, while radio timing must meet the radio's requirements. The Nova227 page lists GPS and IEEE 1588v2 synchronisation. An NTP server for the Ubuntu clock does not by itself establish that the radio has the phase and frequency synchronisation it needs. TDD radios also need an appropriate frame arrangement and coordination with neighbouring systems.
Arrange the authorised radio test environment before first power-up. Do not assume an unconfigured radio is silent. Some documented firmware defaults enable RF. Follow the vendor's procedure to keep transmission disabled until the licence, channel, power, antenna position and timing are ready. Make configuration changes over a local management connection and back up the initial settings before changing them.
For an outdoor installation, use the correct cable and weather seals and have mounting, lightning protection and earthing designed for the location. Do not improvise work at height. Keep the first installation accessible enough that you can inspect labels, power and cabling without dismantling the whole site.
Choose phones with a test plan
Check the manufacturer's band list for the exact regional model number. Apple publishes model-specific cellular band information, and Google publishes Pixel hardware specifications. An unlocked phone with Band 40 is a candidate for testing. Those specifications do not guarantee that it will enable IMS on your chosen private network identity.
Record the model, regional variant, operating system, modem firmware, SIM type and test result. Test network selection, data attachment, an internet page over mobile data, IMS registration, outgoing and incoming calls between your test subscribers, and recovery after a reboot. Check these separately. A phone showing signal bars can still have no data session, and a phone with working data can still have no voice service.
The srsRAN 4G guide for commercial phones provides an accessible reference for the relationship between a Linux host, radio, test USIM and handset. Use it for those concepts while following the configuration for your commercial radio and selected core.
Further reading
Keep the Baicells product specification, the manual for your exact radio, the Open5GS documentation and the manufacturer's specifications for your test phones with your build record. Recheck them when purchasing a different model or upgrading firmware.
Chapter 03
Get permission to use the airwaves
Your mobile network sends information through radio waves. In the UK, you need permission to use the particular frequencies on which your base station transmits. Complete this chapter before enabling the radio. The beginner route described here is an indoor private LTE network using a 10 MHz channel in Band 40. Spectrum information was checked on 1 November 2026.
Understand what you are applying for
A frequency identifies a position in the radio spectrum. MHz means megahertz. A channel occupies a range of frequencies around a centre frequency. Bandwidth describes the width of that channel. Your base station, its settings and the permission issued for your site must agree.
Band 40 is an equipment capability. It covers 2300 to 2400 MHz using time division duplex, usually shortened to TDD. TDD means the base station and phone take turns transmitting in the same channel. Owning a Band 40 radio does not give you permission to use the whole band. See the operating band and channel numbering tables in 3GPP TS 36.101, published by ATIS.
Ofcom offers a Shared Access licence for local networks. Its current 2.3 GHz spectrum blocks are 2320 to 2340 MHz and 2390 to 2400 MHz. These are separate blocks, with other uses between them. The licence you receive will identify what you may actually use. Start with Ofcom's Shared Access licensing page whenever you plan a new installation.
Choose the indoor low power route
For this beginner build, plan to keep the base station and its transmitting antenna indoors. Ofcom's April 2026 guidance says ordinary Shared Access licences in the 2.3 GHz band are available for indoor low power use. Outdoor low power and medium power operation in this band are not standard options. A radio sold as outdoor equipment does not change that rule. Do not describe an antenna mounted outside as an indoor installation because its power supply or computer is inside.
A low power licence authorises base stations within a circle of 50 metres radius around the licensed coordinate. Draw that circle on your site plan and mark each proposed base station. The circle concerns base station placement. It does not promise that every phone within 50 metres will receive a useful signal, or mean that signal stops at the circle's edge.
The 2320 to 2340 MHz block is unavailable within the Salisbury Plain Training Area. Check the current Shared Access guidance, sections 2 and 3. If your intended installation is outdoors, resolve the licensing route with Ofcom before buying a radio for that purpose.
Check the exact radio before you buy it
Ask the supplier for the exact Baicells model number, hardware variant, supported frequency range and firmware version. A listing that says only LTE or Band 40 is not enough to choose a suitable unit. Ask the supplier to confirm, in writing, that this specific radio can use the proposed channel and bandwidth and can reduce its radiated power to the limit on your licence.
Also request the installation manual, antenna specification and declaration of conformity for that model. Record whether the antenna is built into the unit or connected separately. Find out whether the radio's power setting means power per transmit chain, total transmitter output or radiated power. These are different quantities. Keep the supplier's answers with your network records so the next person can understand the installation.
Radio equipment supplied in Great Britain must meet the applicable product requirements. The government's Radio Equipment Regulations guidance explains conformity marking, documentation and supplier responsibilities. Product conformity and a spectrum licence answer different questions: the first concerns the equipment; the second authorises its use under specified conditions.
Prepare an application folder
Create a folder called Spectrum application. Put your site plan, equipment documents and the following information in it before you open the licensing portal. This is a preparation checklist, so some details are for your own installation record rather than separate mandatory portal fields.
- Record the legal name and address of the person or organisation that will hold the licence, a working email address, a telephone number and billing details.
- Write the installation's full postal address and a short name that you will recognise later.
- Find the centre coordinate for the proposed low power area. Record a precise UK National Grid Reference or coordinates in a format accepted by the portal. Check that the point is on the intended building, not a postcode centre or nearby road.
- Mark the 50 metre radius, building boundaries and proposed indoor base station positions on a plan.
- Record the proposed spectrum block and 10 MHz bandwidth. Keep the requested values separate from the values eventually granted.
- Save the radio model, firmware, antenna model, antenna gain, cable details and the completed power worksheet below.
- Write a short description, such as private indoor LTE for authorised test phones and local data access, together with the intended start date.
Ofcom's application form illustrates the identity, location and technical information involved. Its older frequency examples do not replace the current portal or guidance.
Apply, pay and read the issued licence
Follow the licensing portal link on Ofcom's Shared Access page, create or sign in to your account and select the Shared Access product. Choose the indoor low power option appropriate to this build. Enter the prepared details carefully and save the application reference.
Ofcom assesses the application before offering authorisation. An application receipt is not a licence. An invoice is not a licence. Pay an approved application's invoice as instructed, then wait for the actual licence document. Read its assigned channel, bandwidth, site details, power limits, commencement date and conditions before enabling RF. Keep a local copy that you can still read if your internet connection is unavailable.
The current published charge for a low power 10 MHz channel is £80 per year for each licensed area. Budget for the recurring fee as well as the hardware. Check the amount on Ofcom's page when applying. More areas or channels can change the total cost. If a detail on the issued licence differs from your plan, resolve the difference before using the radio.
Enter frequency and bandwidth without guessing
For an illustration only, suppose your issued licence authorises a 10 MHz channel spanning 2390 to 2400 MHz. Its centre is 2395 MHz. An LTE interface that asks for the Band 40 EARFCN would use 39600 for that centre. EARFCN is simply LTE's channel number. This follows the frequency formula and Band 40 offset in section 5.7.3 of 3GPP TS 36.101. Copy your own granted values, not this example by habit.
A 20 MHz channel cannot fit inside the 2390 to 2400 MHz block. The separate 2320 to 2340 MHz block is physically 20 MHz wide, but that does not mean a single 20 MHz Shared Access carrier is automatically authorised. Ofcom's April 2026 guidance describes the current offering as 10 MHz channels and notes that a 20 MHz option for the wider block was not yet available at publication. Check the current offering and your grant before changing bandwidth. Two permissions for smaller channels should not be treated as permission for a wider carrier without explicit authorisation.
Understand dBm, dBi and the power limit
The radio's output setting is only one part of the power calculation. dBm expresses an absolute power level relative to one milliwatt. dBi expresses antenna gain relative to an ideal reference antenna. dB expresses a ratio such as cable loss. You can add gain and subtract loss when all the quantities use these logarithmic units.
EIRP describes the effective radiated power in the strongest direction. The January 2025 IR 2103 interface requirement, table 3.2 specifies 24 dBm EIRP per carrier up to 10 MHz for low power base stations in this spectrum. That is approximately 251 mW EIRP. It is not permission to set every transmitter port to 24 dBm or to use a radio at its advertised maximum output.
Ofcom explains how transmitter output and antenna gain affect radiated power in its guidance on calculating EIRP and ERP. Use manufacturer information for the complete radio and antenna arrangement. Keep EIRP and ERP distinct, and do not substitute an antenna figure labelled dBd for one labelled dBi.
Complete a simple power worksheet
For a simple single transmit chain, write down the transmitter output, subtract cable and connector losses, then add antenna gain. The result is the EIRP estimate. These invented numbers show the arithmetic; they are not Baicells installation settings.
| Item | Example | Your installation |
|---|---|---|
| Transmitter output | 17 dBm | Record the documented value |
| Cable and connector loss | 1 dB | Record the loss at your operating frequency |
| Antenna gain | 6 dBi | Record the antenna's specified gain |
| Estimated EIRP | 17 minus 1 plus 6 equals 22 dBm | Calculate the complete arrangement |
| Illustrative limit | 24 dBm EIRP | Copy the actual licence limit |
In this single chain example, 22 dBm is about 158 mW. A 30 dBm output would instead produce 35 dBm EIRP with the same antenna and cable, which is about 3.16 W. A small difference in the dBm figure can represent a large difference in watts.
LTE radios commonly have multiple transmit chains. Their powers cannot be combined by adding their dBm numbers. Two equal independent contributions can add roughly 3 dB to total power, but the relevant radiated maximum depends on the antenna arrangement and transmit behaviour. Ask the supplier to confirm the complete equipment's compliance with the per carrier limit, including every chain. For an integrated antenna, obtain the manufacturer's radiated power figure instead of inventing an internal cable loss. Leave headroom for tolerances and save the approved setting.
Keep RF disabled during preparation
You can prepare the Ubuntu computer, core software, addresses and configuration files while the base station's RF function remains disabled. Find the manufacturer's RF disable control before connecting power to an unfamiliar radio, because some equipment can resume transmitting after a restart.
There is no general exemption that lets you transmit cellular signals because the equipment is a software defined radio, the network is private or the purpose is learning. A SIM card and a low power setting do not replace authorisation. Do not assume that attaching a dummy load or putting equipment in a box makes an unlicensed radiating test permissible.
If your work needs a separate experimental radio test, read Ofcom's innovation and trial licensing information and resolve the appropriate authorisation first. That product is for temporary, noncommercial experimentation and does not replace permission for an operational network. For this build, the clear checkpoint is possession of the applicable licence before enabling RF.
Save evidence and review changes
Keep the issued licence, payment reference, site plan, radio and antenna specifications, power calculation and final configuration export together. Add a photograph of the installed unit and antenna, with a note identifying the room and mounting position. Make a short change log whenever you move equipment or change power, bandwidth, frequency, antennas or firmware.
Before enabling the radio, compare your configuration against the licence line by line. Ask a second person to read back the site, indoor status, channel and power if one is available. After a power cut or firmware update, confirm that the saved settings have returned correctly. If you later move to another building, do not assume the original location's permission travels with the hardware.
Licence conditions can include deployment records and frequency changes required by Ofcom. The example conditions in Ofcom's Shared Access framework statement explain why those records matter. Use your issued document as the final checklist. Complete this chapter when your authorisation, site plan and configured radio all describe the same installation.
Chapter 04
Understand and plan the network
Give every part a clear job and write down its settings before installing anything.
The connection in ordinary language
The SIM is the phone's membership card, with a secret used to prove that it belongs. The eNodeB is the radio the phone hears. The core checks membership and creates a data session. The packet gateway connects that session to an outside network. DNS turns a name such as a website address into the numeric address a computer can reach.
Radio signal and Internet access are different things. A phone may see the network but fail authentication. It may authenticate but have no route to the Internet. It may reach an IP address but fail to resolve names. Tests later in the guide separate these cases.
The core functions you will meet
| Name | Plain English job | Where it lives in this first build |
|---|---|---|
| MME | Manages the phone joining, moving and becoming reachable again. | Open5GS on the PC. |
| HSS | Holds subscriptions and supplies authentication information. | Open5GS with a local MongoDB database. |
| SGW-C and SGW-U | Arrange and carry the radio-side data tunnel. | Open5GS on the same PC. |
| SMF and UPF acting as PGW | Provide the LTE packet gateway and the phone address pool. | Open5GS on the same PC. |
| PCRF | Provides policy and subscription-related decisions. | Open5GS on the PC. |
| SEGW | Authenticates remote radio sites and encrypts backhaul. | Needed when a site crosses an untrusted network. |
| IMS | Registers compatible phones for native mobile calls and messages. | A later service layer, separate from basic data. |
The example address plan
| Part | Example | Why it is separate |
|---|---|---|
| Home router | 192.168.50.1/24 | Existing broadband and administrator LAN. |
| PC management interface | DHCP reservation 192.168.50.10 on enp1s0 | Updates, SSH and Internet exit. Reserve this address in your router. |
| PC radio interface | 192.168.200.1/24 on enp2s0 | Private physical link to the base station. No default gateway here. |
| Base station management and S1 | 192.168.200.10/24, gateway 192.168.200.1 | The only trusted radio in this initial lab. |
| Phone addresses | 10.45.0.0/16, gateway 10.45.0.1 on ogstun | Separate from administration and the radio management LAN. |
| Core internal traffic | Packaged 127.0.0.x loopback addresses | Functions on the same PC talk locally. Do not publish these. |
| Public address | Your existing router supplies normal outbound NAT | No ASN, leased public block or BGP is needed for this first build. |
If your home already uses one of these ranges, choose unused private ranges before continuing and change every matching example. Your phone pool must not overlap any home, VPN or site subnet. The /24 describes a range of 256 addresses. Devices on that range commonly use addresses ending 1 to 254. A gateway is the next device used to reach destinations outside the local range.
The radio port is dedicated. Do not plug it into an untrusted shared building network. The initial design deliberately keeps the radio and core in one room on private Ethernet. If the eNodeB uses separate management and S1 interfaces, map both using its model-specific manual.
Write a settings sheet
| Setting | First build value | Where it must agree |
|---|---|---|
| MCC and MNC | 999 and 99, with a two-digit MNC | SIM IMSI prefix, eNodeB PLMN, MME GUMMEI and TAI. |
| Tracking area code | 1, decimal | eNodeB and MME. Some radio menus display hexadecimal. |
| APN | internet | Phone APN and HSS subscription. |
| MME S1 address | 192.168.200.1 | MME bind address and radio MME field. |
| SGW-U S1 address | 192.168.200.1 | SGW-U bind address, reachable by the radio. |
| Subscriber authentication | Unique supplier-provided IMSI, K and OPc | USIM and HSS. The values are private. |
| Radio channel | Only the frequency and bandwidth on the licence | eNodeB settings and installed equipment. |
| Time synchronisation | NTP for server time, approved GNSS/PTP source for radio timing | Do not substitute NTP for TDD phase synchronisation. |
999/99 is a private network example, not a unique public identity or a roaming agreement. Another private network can use the same numbers. Choose a coordinated identity for your context and do not broadcast another operator's PLMN. The ITU E.212 recommendation explains private network identifiers.
Draw two security boundaries
First, administration must be reachable only by you. SSH, subscriber editing, databases, monitoring and the radio web interface do not belong on the public Internet. Second, a connected phone is a user device, not an administrator. It must not reach the core's management services, home devices or the base station's web interface.
A SIM proves access rights to the mobile network. It does not make every application trustworthy or every device safe. LTE encryption covers the radio link, an IPsec tunnel covers remote backhaul and HTTPS covers an application connection. Those protections cover different sections of the path.
Choose one core branch for a build. Do not run competing MMEs on the same radio-facing address. The VectorCore chapter gives its own three-host address plan and explains where Open5GS packet gateways remain part of that option. Keep the first network IPv4 only. IPv6 is valuable, but adding it requires a real routed prefix, firewall rules, DNS and return routing. Documentation prefixes such as 2001:db8::/32 cannot provide Internet IPv6. Add that work as a deliberate later change.
Checkpoint
You should be able to point to the phone, radio, core and broadband router on your drawing, explain which address belongs to each and identify where credentials are stored. Keep an ordinary independent way to contact help. This experimental network is not your emergency communications plan.
Chapter 05
Prepare the Ubuntu computer
Install a clean system, separate the cables and get comfortable checking addresses before you install the mobile core.
Install Ubuntu Server
- Choose a spare x86-64 PC with an SSD, at least four useful CPU cores and 8 GB RAM. 16 GB gives more room for learning tools and databases. This is a starting recommendation, not a promised capacity rating. Check MongoDB's current CPU requirements, including AVX on x86-64, before buying an older PC.
- Download the Ubuntu Server 24.04 LTS image from Ubuntu. Verify its checksum using the official download instructions. Write it to a USB stick with a trusted image writer. The USB contents will be erased.
- Back up the PC. Boot from the USB stick and follow the installer. Selecting an installation disk can erase it. Use the spare disk you intended for this project.
- Set a meaningful hostname such as
private-lteand create a normal administrator account such asbuilder. Use a unique password. Enable OpenSSH if you want remote administration on your own LAN. - Connect the first Ethernet port to your broadband router. Keep the second Ethernet port for the eNodeB network. Initially leave the radio unpowered unless the licence and safe RF arrangement are ready.
- Finish installation, remove the USB stick and reboot. Sign in at the local keyboard and display.
Ubuntu Desktop can run the same software, but this guide uses Server's Netplan and systemd-networkd arrangement. If you use a desktop managed by NetworkManager, make the equivalent wired settings there instead of maintaining competing configurations.
Update and identify the interfaces
sudo apt update
sudo apt full-upgrade
sudo apt install curl ca-certificates gnupg software-properties-common   openssh-server nftables tcpdump python3-yaml nano
sudo reboot
Sign back in and run:
cat /etc/os-release
ip -br link
ip -br address
ip route
timedatectl status
Look for Ubuntu 24.04, an address on the router's LAN and a default route through that router. The cable that reaches the router is the management and Internet interface. Unplugging one cable briefly and checking link state can help identify a port. Write the real names down. enp1s0 and enp2s0 are only examples.
Check that system time is synchronised. Certificate validation and useful logs depend on it. Server NTP does not supply the timing needed to synchronise an LTE TDD cell.
Keep one default route
Make a DHCP reservation for the PC in your router, for example 192.168.50.10. Keep DHCP on its router-facing interface. Give the radio-facing interface a static address. Back up and edit the existing Netplan file shown by ls /etc/netplan. Merge these interface settings into that file, preserving its existing top-level network settings. Do not leave duplicate definitions in several files.
network:
  version: 2
  renderer: networkd
  ethernets:
    enp1s0:
      dhcp4: true
      dhcp6: false
      accept-ra: false
      link-local: []
    enp2s0:
      dhcp4: false
      dhcp6: false
      accept-ra: false
      link-local: []
      addresses:
        - 192.168.200.1/24
sudo netplan generate
sudo netplan tryRun this at the local console. netplan try asks you to confirm the working configuration and otherwise rolls it back. Check ip -br address and ip route again. There should be one IPv4 default route through the home router, plus a connected route for 192.168.200.0/24. There is no gateway on the radio port. Follow Netplan's examples if your installer uses a different file layout.
Make a private place for configuration backups
sudo install -d -m 700 /root/private-lte-backups
sudo cp -a /etc/netplan /root/private-lte-backups/netplan-initial
sudo systemctl enable --now ssh
systemctl --failed
Use an SSH key from your administrator computer and verify that it works in a second session before changing password access. If you want to disable SSH password login, edit a dedicated file under /etc/ssh/sshd_config.d/, validate it with sudo sshd -t and reload SSH only after that check passes. Keep the local console available. Do not forward port 22 from the Internet router for this lab.
Checkpoint
The PC should install updates, resolve names, show correct time and keep its addresses after a reboot. You should know which physical port is the radio port. Stop and fix basic Ubuntu networking before installing a core. A mobile service cannot repair a missing default route or a disconnected cable.
Set the firewall in the next chapters before connecting devices or opening administration. The core uses loopback by default, which keeps its components local while you prepare it.
Chapter 06
Install and configure the 4G core
The core turns a radio connection into an authenticated data session. Keep its internal components on the same PC for your first build.
Install MongoDB for Ubuntu 24.04
MongoDB stores the subscriptions. These commands use MongoDB's official 8.0 repository for Ubuntu 24.04 Noble. Do not substitute a Jammy repository or the unrelated Ubuntu mongodb package. Check MongoDB's current installation instructions if you choose another operating system.
curl -fsSL https://pgp.mongodb.com/server-8.0.asc   -o /tmp/mongodb-server-8.0.asc
sudo gpg --dearmor -o /usr/share/keyrings/mongodb-server-8.0.gpg   /tmp/mongodb-server-8.0.asc
echo 'deb [arch=amd64 signed-by=/usr/share/keyrings/mongodb-server-8.0.gpg] https://repo.mongodb.org/apt/ubuntu noble/mongodb-org/8.0 multiverse'   | sudo tee /etc/apt/sources.list.d/mongodb-org-8.0.list
sudo apt update
sudo apt install mongodb-org
sudo systemctl enable --now mongod
systemctl is-active mongod
Expected result: active. Keep net.bindIp in /etc/mongod.conf restricted to 127.0.0.1 for this single-host lab. The later firewall also blocks remote database access. Subscriber backups contain long-term authentication secrets and need encrypted storage.
Install Open5GS and record the versions
sudo add-apt-repository ppa:open5gs/latest
sudo apt update
sudo apt install open5gs
apt-cache policy open5gs
dpkg-query -W 'open5gs*' mongodb-org
sudo cp -a /etc/open5gs /root/private-lte-backups/open5gs-initial
sudo cp -a /etc/freeDiameter /root/private-lte-backups/freeDiameter-initial
The public project provides both 4G and 5G functions. This guide uses its LTE EPC roles. Keep the package's working local connections, including its loopback control addresses, Diameter files and any NRF/SCP dependencies used by the installed SMF. There is no reason to expose every function simply because it is installed.
At publication, Open5GS 2.8.0 was the latest tagged release. The examples use that configuration family, not a promise that the PPA always installs the same version. Compare the installed files with the official quickstart. If their structure differs, follow the matching release documentation rather than inserting guessed keys.
Let the MME listen to the radio
Open /etc/open5gs/mme.yaml with sudo nano. Change the existing mme.s1ap.server address to 192.168.200.1. Change both PLMN entries, under gummei and tai, to the same MCC and two-digit MNC as your SIM. Keep the tracking area consistent with the radio. These are extracts within the existing mme: block:
  s1ap:
    server:
      - address: 192.168.200.1
  gummei:
    - plmn_id:
        mcc: 999
        mnc: 99
      mme_gid: 2
      mme_code: 1
  tai:
    - plmn_id:
        mcc: 999
        mnc: 99
      tac: 1
  security:
    integrity_order: [ EIA2, EIA1 ]
    ciphering_order: [ EEA2, EEA1 ]
  network_name:
    full: My Private LTE
    short: PrivateLTE
These MME settings select NAS protection algorithms for control signalling. Check the eNodeB's separate access-stratum security settings and verify that normal radio bearers also use supported non-null protection. The non-null integrity and cipher choices above deliberately avoid selecting the unprotected EIA0 and EEA0 algorithms in this normal LTE data lab. Check that the handset and eNodeB support the selected algorithms. Do not solve a security negotiation failure by silently enabling unprotected operation. Leave gtpc, Diameter and other internal addresses at the package defaults.
Save in nano with Ctrl+O, Enter, then Ctrl+X. Network display names may also come from SIM files or handset configuration, so changing this text alone does not guarantee the same name on every phone.
Let the SGW-U carry radio traffic
Open /etc/open5gs/sgwu.yaml. Change only its radio-facing GTP-U server address. The extract inside sgwu: is:
  gtpu:
    server:
      - address: 192.168.200.1
Keep the PFCP and other control connections at their local defaults. The same PC can bind the MME's SCTP signalling and SGW-U's UDP data to the same address because they use different protocols and ports. The release SGW-U configuration describes these fields.
Use one IPv4 phone pool
In /etc/open5gs/smf.yaml, edit the existing session and DNS lists. Remove the example IPv6 session and IPv6 DNS entries for this first IPv4 build. This extract belongs within smf::
  session:
    - subnet: 10.45.0.0/16
      gateway: 10.45.0.1
  dns:
    - 1.1.1.1
    - 9.9.9.9
  mtu: 1400
These are example public resolvers. Choose resolvers whose operation and privacy terms suit your network. In /etc/open5gs/upf.yaml, keep the matching IPv4 session and remove the example IPv6 session:
  session:
    - subnet: 10.45.0.0/16
      gateway: 10.45.0.1
Leave the UPF's GTP-U address local in this one-PC LTE layout. The external radio reaches SGW-U, not the UPF directly. A 1400-byte inner MTU is a cautious starting value, not a cure for all transport faults. Recheck it when adding IPsec. The SMF and UPF release examples explain the available fields.
Check the phone tunnel interface
ip -br address show ogstun
ip route show 10.45.0.0/16
The packaged installation normally prepares an ogstun interface for the phone pool. Expected: it is up with 10.45.0.1/16 and a connected route for that pool. If it is absent, check the installed package's network setup first. Do not create a second competing configuration. On a clean install with no package-managed ogstun, use this explicit systemd unit:
[Unit]
Description=Private LTE subscriber TUN
Before=open5gs-upfd.service
After=network.target

[Service]
Type=oneshot
RemainAfterExit=yes
ExecStart=/usr/sbin/ip tuntap add dev ogstun mode tun
ExecStart=/usr/sbin/ip address add 10.45.0.1/16 dev ogstun
ExecStart=/usr/sbin/ip link set dev ogstun up
ExecStop=/usr/sbin/ip link delete dev ogstun

[Install]
WantedBy=multi-user.target
Verify no existing tool owns ogstun, then save the unit as /etc/systemd/system/private-lte-tun.service, then run sudo systemctl daemon-reload and sudo systemctl enable --now private-lte-tun. Use exactly one owner for the interface. An existing interface error is a reason to inspect, not to delete a live tunnel.
Validate and start the core
sudo python3 - <<'PY'
from pathlib import Path
import yaml
for name in ['mme', 'sgwu', 'smf', 'upf']:
    yaml.safe_load(Path('/etc/open5gs/' + name + '.yaml').read_text())
    print(name + ': YAML parsed')
PY
sudo systemctl restart open5gs-mmed open5gs-sgwud open5gs-smfd open5gs-upfd
systemctl is-active mongod open5gs-hssd open5gs-mmed open5gs-pcrfd   open5gs-sgwcd open5gs-sgwud open5gs-smfd open5gs-upfd
sudo ss -lnp -A sctp
sudo ss -lunp
systemctl --failed
YAML parsing checks layout, not whether Open5GS accepts every key. The services must remain active and their logs must show successful configuration, subscriber database and gateway peer connections. The MME should listen on 192.168.200.1 with SCTP port 36412. SGW-U should listen on UDP 2152 at that address. Internal connections should remain on loopback. If a service fails, inspect sudo journalctl -u open5gs-mmed -n 60 --no-pager, substituting the service that failed.
Make a new private backup when this checkpoint passes. Do not put live keys, database records or diagnostic logs into a public Git repository.
Chapter 07
Build with VectorCore
Build the public VectorCore MME, HSS and serving gateway, with Open5GS as the packet gateway. Follow a separate LAN plan, source build, configuration and subscriber provisioning path.
Choose what VectorCore will do
Source-verified reference build: this exact fresh three-VM installation has not been run end to end. Complete the peer, attachment, data and isolation tests on your equipment before relying on it.
VectorCore is another way to build the LTE core behind your Baicells radio. Its public projects provide a Mobility Management Entity, called the MME, a Home Subscriber Server, called the HSS, and a Serving Gateway split into control and user plane programs. The MME manages the phone's connection. The HSS stores the subscriber information needed to authenticate the SIM. The gateway moves traffic between the radio side and the packet gateway.
The build in this chapter combines those VectorCore components with the Open5GS SMF and UPF as the LTE packet gateway. The HSS also supplies the PCRF policy role. The public VectorCore organisation did not provide a separate packet gateway repository when checked on 1 November 2026, so cloning only its MME, HSS and SGW is not a complete internet access network.
Choose this route if you want to learn how these components fit together and use the VectorCore management interfaces. The Open5GS route is available as a complete alternative. The hybrid route described here is an integration recipe based on the checked public source. Its final checkpoint is a successful attach and data test on your own equipment. Read the VectorCore organisation and Open5GS's explanation of SMF and UPF providing the 4G packet gateway roles.
Use three clearly named Linux environments
You can host the environments as virtual machines on one Ubuntu PC. Give each a fixed address on a private core network and make sure they can reach one another before installing software. These example addresses belong to this chapter's example only. Replace them consistently if your network uses another subnet.
| Name | Example address | Programs |
|---|---|---|
| vc-control | 10.77.0.10 | VectorCore HSS, PostgreSQL and MME |
| vc-sgw | 10.77.0.20 | VectorCore SGW-C and SGW-U |
| vc-pgw | 10.77.0.30 | Open5GS SMF and UPF |
The radio uses 10.77.0.10 as its MME address. Its user traffic must also reach 10.77.0.20. The gateway environments must reach each other. This layout keeps MME and packet gateway control sockets on different hosts, avoiding an accidental conflict where two programs try to bind UDP port 2123 on the same address.
Keep this traffic on your protected core network. Carry any remote radio link through the secure backhaul described elsewhere in the guide. A private address alone does not encrypt traffic or authenticate a peer. Allow only the intended peers through the firewall, and keep management APIs on loopback addresses. Leave the radio's RF function disabled while completing the software build.
Connect the VMs and radio to the same wired network
Use a wired Ethernet connection for the radio network. A practical host has one connection for normal internet and management access and a separate Ethernet port connected to a small core network switch. Connect the Baicells Ethernet or PoE injector's LAN side to that switch. Use only the power supply or PoE type specified for your exact radio.
Install your hypervisor using Ubuntu's libvirt instructions. Create a bridge on the dedicated core Ethernet interface, following Ubuntu's bridge configuration reference. Give it a recognisable name such as br-core. Do not move your existing management connection into an example bridge without checking its configuration. The host can use 10.77.0.5/24 on this dedicated bridge, with no default gateway on that interface.
- In each VM's network settings, add a bridged adapter connected to br-core. In virt-manager, choose a bridge device as the source and enter the actual bridge name.
- Give the VM's core adapter its table address with a /24 prefix, equivalent to subnet mask 255.255.255.0. Exclude these addresses from any DHCP pool. Set no default gateway on the dedicated core adapter.
- If needed, give each VM a second adapter on the hypervisor's ordinary NAT network for software downloads and management. That adapter supplies the default route. The radio must reach the bridged core addresses directly, rather than depending on this outbound NAT.
- Set the radio's S1 network address to a unique address such as 10.77.0.40/24. Set its MME address to 10.77.0.10. If radio management and S1 addresses are separate settings, make sure the address used for S1 and GTP-U is reachable on the core network. Use a default gateway only if you have actually configured a router for it.
- From each VM, run ip -brief address and confirm its assigned core address. From vc-sgw, run ip route get 10.77.0.40 and record the interface name. That core interface, rather than the NAT adapter, is the SGW-U ifname to configure later.
For this layout, the radio, vc-control, vc-sgw and vc-pgw must all reach one another over the same core subnet. Check address uniqueness and switch connections before debugging telecom protocols. The libvirt bridge documentation explains that a bridged VM appears on the physical LAN. Apply the peer firewall rules below before starting services. Keep subscriber traffic isolation on vc-pgw, where packets leave the phone's tunnel; a bridge alone provides no such isolation.
Install build tools that match the source
Use Ubuntu 24.04 on an x86_64 PC for this example. Check the architecture with uname -m. The checked SGW generator includes an x86_64 Linux header path, so another architecture needs its own verification. On each environment that will compile VectorCore, install the common tools:
sudo apt update
sudo apt install git ca-certificates curl build-essential pkg-config clang llvm libbpf-dev linux-libc-dev libsctp-dev lksctp-tools libsqlite3-dev jq
sudo modprobe sctp
uname -r
The actual module files matter more than an older README requirement. The checked MME requires Go 1.26.1, the HSS requires Go 1.25.0 and the SGW requires Go 1.26.2. Install a supported Go toolchain at least as new as 1.26.2 using the official Go instructions and verify the archive checksum shown on Go's downloads page. The standard Ubuntu package should not be assumed to meet this requirement. Go 1.27.3 was the featured release when this chapter was checked.
Install a supported Node.js LTS release with npm from the official Node.js distribution on the environments building the HSS and MME web interfaces. Then check go version, node --version and npm --version. Keep their output in your build notes. The pinned MME module, HSS module and SGW module provide the exact requirements.
Download a recorded version
Create a source directory on the machine doing the builds. Git downloads the project. A detached checkout selects one recorded revision, identified by its full commit hash. These are the revisions inspected for this chapter:
mkdir -p vectorcore-src
cd vectorcore-src
git clone https://github.com/vectorcore-mobile/vectorcore-hss.git
git -C vectorcore-hss checkout --detach c8a4c0f2bf8b42176e4a89ccd979b4dd270ce037
git clone https://github.com/vectorcore-mobile/vectorcore-mme.git
git -C vectorcore-mme checkout --detach 04d436ed1589b0f0882e6a061a025a752d87376f
git clone https://github.com/vectorcore-mobile/vectorcore-sgw.git
git -C vectorcore-sgw checkout --detach ac7dc41724696a2d59b94b31c89769f9854c2873
Do not use a changing branch as the only record of what you installed. Save each result from git rev-parse HEAD, the build tool versions and the Open5GS version alongside your final configuration. When upgrading, review the new requirements and configuration changes, test them in a separate environment and keep a way to restore the previous working set. A version pin records a known source state; it does not remove the need for security updates.
Build the programs without starting services
Run each block inside the named repository. A successful build creates binaries in its bin directory. The commands below follow the checked Makefiles. They compile programs and run their tests; they do not configure a working subscriber or enable the radio.
cd vectorcore-hss
make build
go test ./...
cd ../vectorcore-mme
make
make test
cp config/mme.yaml.example config/mme.yaml
cd ../vectorcore-sgw
make
make verify
The HSS output is bin/hss. The MME output is bin/mme. The SGW produces bin/sgw-c, bin/sgw-u and bin/sgwctl. The SGW build generates an eBPF program, which is code the Linux kernel runs to forward gateway packets. A build that passes without privileges may skip some kernel runtime tests. It therefore does not prove that XDP can attach to your chosen network interface.
Follow the output if a build fails. A complaint about the Go version means the toolchain is too old. A complaint about clang, BPF headers or architecture includes concerns the gateway build environment. Do not fix these by downloading an unexplained installer. The official MME, HSS and SGW Makefiles show exactly what these targets do.
Do not run the advertised installation targets yet. The checked MME and HSS targets enable and start services immediately. The checked SGW installation target also refers to a documentation file absent from that public checkout. The staged installation below avoids both problems.
Prepare the HSS database and protect management
On vc-control, install PostgreSQL and create a dedicated database account. Enter a new strong password when prompted. Do not reuse a sample password from a repository.
sudo apt install postgresql
sudo systemctl enable --now postgresql
sudo -u postgres createuser --pwprompt vectorcore_hss
sudo -u postgres createdb -O vectorcore_hss vectorcore_hss
Copy config/hss.yaml to a private working file called hss.local.yaml. Edit existing sections rather than adding a second copy of the same YAML key. Set database.db_type to postgresql, server to 127.0.0.1, port to 5432, and both username and database to vectorcore_hss. Enter your chosen password in the password field.
Set hss.MCC to the quoted string "999" and hss.MNC to "99" for this private example. Use hss.epc.mnc099.mcc999.3gppnetwork.org as OriginHost and epc.mnc099.mcc999.3gppnetwork.org as OriginRealm. Set BindAddress to 10.77.0.10 and leave BindPort at 3868. TCP Diameter is sufficient for these peers, so set EnableSCTP to false unless you deliberately choose SCTP throughout.
Set geored.enabled and gsup.enabled to false. Keep both 5GC UDM and PCF functions disabled for this LTE build. Set api.bind_address to 127.0.0.1, api.auth_enabled to true and configure a new random API key. Do not reuse the public sample's replication token. Keep api.bind_port at 8080. The sample configuration contains more services than this initial build needs.
Configure the MME to find your HSS and gateways
Edit the copied config/mme.yaml. Use the same quoted MCC and MNC in nf and every active nf.tai_list entry. Set Tracking Area Code, abbreviated TAC, to 1 for this example and configure the same TAC in the Baicells. Leave the example's MME group and code at 1 while running one MME.
| Setting | Example value |
|---|---|
| s1ap.bind_address | 10.77.0.10 |
| s1ap.bind_port | 36412 |
| s11.bind_address | 10.77.0.10 |
| s11.bind_port | 2123 |
| diameter.origin_host | mme.epc.mnc099.mcc999.3gppnetwork.org |
| diameter.origin_realm | epc.mnc099.mcc999.3gppnetwork.org |
| diameter.peers first entry | name hss-1, address 10.77.0.10:3868, transport tcp |
| gateway_selection.sgw.sgw_address | 10.77.0.20:2123 |
| gateway_selection.pgw.pgw_address | 10.77.0.30:2123 |
For this first network, set gateway_selection.dns.enabled to false so gateway choice uses the explicit addresses. Set gateway_selection.pgw.prefer_s6a_static to false unless you also deliberately provision a packet gateway address in the HSS APN profile. Keep roaming and the optional SMS, location, inter-MME and public warning interfaces disabled while proving basic data access.
Bind the MME API to 127.0.0.1 on port 8085. Set operator.nitz.timezone to Europe/London. For normal authenticated service, use integrity algorithms EIA2 and EIA1 and ciphering algorithms EEA2 and EEA1, leaving the null algorithms out of this example's preference lists. Keep ims_voice_over_ps false until the IMS service is ready. The supported fields are documented in the MME configuration reference and example YAML.
Configure the serving gateway
On vc-sgw, copy configs/sgw-c.yaml and configs/sgw-u.yaml to sgw-c.local.yaml and sgw-u.local.yaml. Keep the current section structure. The parser rejects older layouts, including the old top-level s11 block.
In SGW-C, set sgwc.plmn.mcc to "999", MNC to "99", and sgwc.control_plane_ip to 10.77.0.20. Give the named control interface a listen address of 10.77.0.20:2123. Both gtpc.s11.bind and gtpc.s5c.bind must reference that interface's name. The name is a YAML label, not necessarily a Linux network card name.
Because SGW-C and SGW-U share this environment, use 127.0.0.1:8805 for the SGW-C PFCP endpoint and 127.0.0.2:8805 for the SGW-U endpoint. Match the SGW-C peer's node_id to sgwu.node_id. Put 127.0.0.1 in SGW-U's pfcp.allowed_sgwc list.
Find the actual Linux interface with ip -brief address. In SGW-U, set the user interface's ifname to that name and its listen to 10.77.0.20:2152. Reference the named interface from both gtpu.s1u.bind and gtpu.s5u.bind. Use xdp-generic initially, keep cleanup_on_exit enabled, and bind API and metrics listeners to 127.0.0.1. The user plane needs a concrete IPv4 address, not 0.0.0.0. Validate both edited files:
./bin/sgwctl validate -sgwc sgw-c.local.yaml -sgwu sgw-u.local.yamlDo not continue until validation succeeds. The SGW configuration reference explains the current schema, Linux interface handling and privileges needed by the eBPF dataplane.
Connect the Open5GS packet gateway
On vc-pgw, complete the Open5GS software installation described in the Open5GS chapter, then configure only its SMF and UPF for this route. Subscriber and policy data come from VectorCore HSS. Avoid running a second HSS, PCRF, MME or serving gateway for the same network. Record the Open5GS package version and retain its matching configuration templates.
On a new dedicated vc-pgw with the packaged Open5GS installation, stop and disable the components supplied by VectorCore. Run this only on vc-pgw, not on an existing network serving users:
sudo systemctl disable --now open5gs-mmed open5gs-hssd open5gs-sgwcd open5gs-sgwud open5gs-pcrfdKeep open5gs-smfd and open5gs-upfd for the packet gateway. Preserve open5gs-nrfd and open5gs-scpd if the installed SMF template points to them. This command deliberately leaves those dependencies alone. Check the actual service list with systemctl list-unit-files 'open5gs-*'. For a source installation without packaged service units, stop the equivalent replaced processes through the supervisor you installed. Do not run duplicate functions because a package installation happened to start them.
In /etc/open5gs/smf.yaml, change the SMF GTP-C server address to 10.77.0.30, which is the packet gateway address entered in the MME. Keep SMF and UPF PFCP endpoints distinct on their shared host, for example the installed defaults 127.0.0.4 and 127.0.0.7. The SMF's UPF peer must point at the UPF's PFCP endpoint.
In /etc/open5gs/upf.yaml, change its GTP-U server address to 10.77.0.30 so vc-sgw can reach it. Use the same phone address pool and gateway in both SMF and UPF. For an internet APN example, use 10.45.0.0/16 with gateway 10.45.0.1, then apply the guide's forwarding, TUN interface, DNS and restricted internet egress instructions on vc-pgw. Avoid overlap with your LAN, VPN or any other phone address pool. Keep one IPv4 APN initially.
In /etc/freeDiameter/smf.conf, replace the default PCRF peer with your VectorCore HSS identity and address. Edit the existing identity, realm, ListenOn and ConnectPeer statements; preserve the installed dictionary extension paths:
Identity = "smf.epc.mnc099.mcc999.3gppnetwork.org";
Realm = "epc.mnc099.mcc999.3gppnetwork.org";
ListenOn = "10.77.0.30";
ConnectPeer = "hss.epc.mnc099.mcc999.3gppnetwork.org" {
    ConnectTo = "10.77.0.10";
    Port = 3868;
    No_SCTP;
    No_TLS;
};
This explicit TCP example relies on the protected core transport. Do not expose unencrypted Diameter to the internet. Configure local name resolution for those identities, and make sure the HSS OriginHost exactly matches ConnectPeer. The official Open5GS SMF template, UPF template and Diameter template show the supported fields. Package templates are already expanded, so do not copy literal build placeholders such as @sysconfdir@ into an installed configuration.
Stage installation before enabling anything
On vc-control, from each appropriate repository, install the built binary and your edited configuration. Create the persistent database and log directories before starting the MME. The following commands deliberately do not start a service:
sudo install -d /opt/vectorcore/bin /opt/vectorcore/etc /opt/vectorcore/log /opt/vectorcore/var
# From vectorcore-hss:
sudo install -m 755 bin/hss /opt/vectorcore/bin/hss
sudo install -m 600 hss.local.yaml /opt/vectorcore/etc/hss.yaml
sudo install -m 644 systemd/vectorcore-hss.service /etc/systemd/system/vectorcore-hss.service
# From vectorcore-mme:
sudo install -m 755 bin/mme /opt/vectorcore/bin/mme
sudo install -m 600 config/mme.yaml /opt/vectorcore/etc/mme.yaml
sudo install -m 644 systemd/vectorcore-mme.service /etc/systemd/system/vectorcore-mme.service
sudo systemctl daemon-reload
On vc-sgw, from its repository, install the gateway files and the supplied service units:
sudo install -d /opt/vectorcore/bin /opt/vectorcore/etc /opt/vectorcore/log /var/lib/vectorcore-sgw /var/log/vectorcore/sgw
sudo install -m 755 bin/sgw-c bin/sgw-u bin/sgwctl /opt/vectorcore/bin/
sudo install -m 600 sgw-c.local.yaml /opt/vectorcore/etc/sgw-c.yaml
sudo install -m 600 sgw-u.local.yaml /opt/vectorcore/etc/sgw-u.yaml
sudo install -m 644 deploy/systemd/vectorcore-sgw-c.service /etc/systemd/system/vectorcore-sgw-c.service
sudo install -m 644 deploy/systemd/vectorcore-sgw-u.service /etc/systemd/system/vectorcore-sgw-u.service
sudo systemctl daemon-reload
The supplied SGW-U unit grants privileges needed for eBPF attachment and sets the memory lock limit. Review the upstream unit rather than guessing capabilities. Preserve API loopback bindings and restrict configuration files because the HSS file contains credentials. Use the log paths recorded in your edited files.
Create the APN, authentication record and subscriber
Start the HSS on vc-control with sudo systemctl start vectorcore-hss. Confirm it connects to PostgreSQL before provisioning. Reach management through an SSH tunnel from your own computer, using your actual administrative SSH user:
ssh -N -L 18080:127.0.0.1:8080 YOUR_ADMIN_USER@10.77.0.10Leave the tunnel terminal open and use the local address http://127.0.0.1:18080. The current API documentation is at /api/v1/docs and the schema at /api/v1/openapi.json. Supply the configured key in the X-API-Key header when using the API. Avoid putting that key in a URL, screenshot or shared command history.
- Create an APN named
internetatPOST /api/v1/apn. Use IPv4, represented by ip_version 0 in the current API. Record the returned apn_id. - Create an authentication record at
POST /api/v1/subscriber/auc. Enter the IMSI, Ki, OPc and AMF supplied for your own SIM. Record the returned auc_id. Ki and OPc are secret key material. Do not use the public README's test keys for your own network. - Create the EPC subscriber at
POST /api/v1/subscriber. Use the same IMSI, the returned auc_id, the APN ID as default_apn and that ID in apn_list. Add only the services you intend to provide. - Set the phone's APN to
internetand make sure the SIM identity uses the chosen private PLMN. Recheck every digit before testing.
The short README examples use older paths, so follow the current API reference and current authentication routes. APN, authentication and subscriber are three linked records. Creating only one does not complete provisioning. This initial data build does not require an IMS subscriber. Add IMS provisioning when you follow the voice chapter.
Apply the firewall rules for this three host route
The single computer Open5GS firewall example elsewhere in this guide cannot be copied unchanged into this three host route. Traffic that used loopback now crosses the bridge. Write peer rules for these actual source and destination addresses, on both the guest firewalls and any intervening firewall. Preserve your administrative SSH path before applying restrictions.
| Receiving host | Allowed source | Transport and port | Purpose |
|---|---|---|---|
| vc-control 10.77.0.10 | Radio 10.77.0.40 | SCTP 36412 | S1 signalling to MME |
| vc-control 10.77.0.10 | vc-sgw 10.77.0.20 | UDP 2123 | Serving gateway control and notifications |
| vc-control 10.77.0.10 | vc-pgw 10.77.0.30 and the local MME | TCP 3868 | Diameter policy and authentication |
| vc-sgw 10.77.0.20 | vc-control 10.77.0.10 and vc-pgw 10.77.0.30 | UDP 2123 | Gateway control signalling |
| vc-sgw 10.77.0.20 | Radio 10.77.0.40 and vc-pgw 10.77.0.30 | UDP 2152 | GTP-U phone traffic |
| vc-pgw 10.77.0.30 | vc-sgw 10.77.0.20 | UDP 2123 and 2152 | Packet gateway control and phone traffic |
| Each host | Your approved management address only | TCP 22 | Administrative SSH |
Allow the corresponding replies through your stateful firewall. Do not allow an entire subnet just because one peer is permitted. Keep SGW-C and SGW-U PFCP on local 127.0.0.1 and 127.0.0.2 using UDP 8805. Keep SMF and UPF PFCP on local 127.0.0.4 and 127.0.0.7 using UDP 8805. Those pairs need no external PFCP opening in this placement.
On vc-control, management ports 8080 and 8085 stay on loopback. On vc-sgw, APIs 8080 and 8081 and metrics 9090 and 9091 stay on loopback. Keep vc-pgw's management and metrics local too. The checked sgwctl defaults are http://127.0.0.1:8080 for SGW-C and http://127.0.0.1:8081 for SGW-U, so its health and PFCP commands work locally with the earlier configuration.
Apply the guide's subscriber egress policy at vc-pgw's ogstun and outbound path. Preserve the intended restriction against phone access to the management network and private LANs. Core signalling ACLs protect network components; they do not replace the policy on the phone's decoded traffic. Test those restrictions as well as permitted internet traffic.
Start in order and check each connection
Start PostgreSQL and the HSS first. Start Open5GS UPF and SMF on vc-pgw after their configuration and TUN interface are ready. On vc-sgw, start SGW-U before SGW-C. Then start the MME on vc-control:
# On vc-pgw, for a package installation:
sudo systemctl start open5gs-upfd open5gs-smfd
# On vc-sgw:
sudo systemctl start vectorcore-sgw-u
sudo systemctl start vectorcore-sgw-c
/opt/vectorcore/bin/sgwctl health
/opt/vectorcore/bin/sgwctl pfcp
# On vc-control:
sudo systemctl start vectorcore-mme
sudo systemctl status vectorcore-hss vectorcore-mme --no-pager
On vc-control, the MME should establish its Diameter connection to the HSS. On vc-pgw, the SMF should connect to the same HSS for Gx policy and associate with its UPF over PFCP. On vc-sgw, SGW-C and SGW-U should associate over PFCP. Check journalctl -u SERVICE_NAME -n 100 --no-pager and each program's configured log file. A systemd status of running proves only that the process remains alive.
Useful peer rules for this example are the Baicells to vc-control on SCTP 36412, Baicells to vc-sgw on UDP 2152, vc-control to vc-sgw on UDP 2123, and vc-sgw to vc-pgw on UDP 2123 and 2152. Diameter on TCP 3868 reaches vc-control only from the intended MME and SMF peers. The two local PFCP pairs can remain on their respective hosts' loopback addresses. Do not open management ports to make a signalling connection work.
The sgwctl implementation provides health, PFCP, peer, session, bearer and BPF inspections. A skipped BPF runtime test or a failed XDP attach is a gateway problem to resolve before attempting radio service.
Prove data access before enabling voice
With your spectrum licence in force and the radio configured within its conditions, enable RF and register one authorised test phone. Confirm the base station connects to the MME, the SIM authenticates, a default bearer is created and the phone receives an address from the intended pool. Then test a permitted public HTTPS destination and check internet routing and DNS separately. Confirm that private management and LAN destinations remain blocked by the intended subscriber isolation policy. These checks locate the failure instead of treating every symptom as a radio problem.
If attach works but data does not, inspect the SGW sessions and BPF counters, the UPF session, forwarding and return routes. If authentication fails, recheck the actual SIM's IMSI, Ki, OPc, AMF and sequence synchronisation. Do not repeatedly replace secret keys with values copied from another guide. If the eNB cannot connect, check its PLMN, TAC, MME address, SCTP reachability and the MME's served tracking area.
After the baseline succeeds, enable the verified services at boot on each appropriate host and perform a controlled restart test. Keep the same source revisions and back up PostgreSQL, configuration files and any persistent MME state. Restore a backup into an isolated environment before relying on it. Add the IMS APN, IMS subscriber records, voice policy and device carrier configuration as a separate step. A working LTE data session is the foundation for that work, and does not by itself establish VoLTE or emergency calling.
Chapter 08
Protect the LAN and phone traffic
A LAN-only radio does not need IPsec. It still needs clear access boundaries so a connected phone cannot administer your computer or home router.
Choose one firewall owner
This worked ruleset is for a fresh, dedicated Ubuntu lab PC using the exact address plan in the planning chapter. It is not a ruleset for a home router, Docker host, production server or a PC already running UFW, firewalld or another firewall manager. Check first:
sudo ufw status
sudo nft list ruleset
ip -br address
ip route
Continue with this complete example only when UFW is inactive and there are no existing rules you need to preserve. Otherwise merge the same policy into your existing firewall with help from its documentation. The file below contains flush ruleset, which atomically replaces the PC's rules when loaded. Do not use it on a host with unrelated firewall rules.
Keep a local keyboard and screen available. Substitute your real interface names and management subnet before applying it. Do not enable IPv4 forwarding until the forward policy is in place.
The policy in plain English
- Local core functions can talk through loopback.
- Only the administrator LAN can reach SSH on the PC.
- Only the known eNodeB address can reach MME SCTP 36412 and SGW-U UDP 2152 through the radio interface.
- Phone-originated connections cannot reach the core itself, home/private destinations or other phones through this router.
- Phones can make outbound Internet connections and receive their replies.
- The base station is not given general Internet forwarding. Firmware, time and management access are added deliberately if needed.
Subscriber isolation inside a base station can also depend on radio features. Disable any local switching or bridging function that bypasses the core's isolation. Use a managed switch or physical separation to prevent an unauthorised device joining the radio Ethernet.
Create the dedicated lab firewall
Back up any existing file and save the following as /etc/nftables.conf with sudo nano. All the address values here are examples from the planning chapter.
#!/usr/sbin/nft -f
flush ruleset

table inet private_lte {
  set non_public_v4 {
    type ipv4_addr
    flags interval
    elements = { 0.0.0.0/8, 10.0.0.0/8, 100.64.0.0/10,
      127.0.0.0/8, 169.254.0.0/16, 172.16.0.0/12,
      192.168.0.0/16, 224.0.0.0/4, 240.0.0.0/4 }
  }
  chain input {
    type filter hook input priority filter; policy drop;
    iifname "lo" accept
    iifname "ogstun" counter drop
    ip saddr 10.45.0.0/16 counter drop
    ct state invalid drop
    ct state established,related accept
    iifname "enp1s0" ip saddr 192.168.50.0/24 tcp dport 22 accept
    iifname "enp1s0" udp sport 67 udp dport 68 accept
    iifname "enp2s0" ip saddr 192.168.200.10 sctp dport 36412 accept
    iifname "enp2s0" ip saddr 192.168.200.10 udp dport 2152 accept
    ip protocol icmp accept
    meta l4proto ipv6-icmp accept
  }
  chain forward {
    type filter hook forward priority filter; policy drop;
    ct state invalid drop
    iifname "ogstun" ip daddr @non_public_v4 counter drop
    iifname "ogstun" oifname "enp1s0" ip saddr 10.45.0.0/16 counter accept
    iifname "enp1s0" oifname "ogstun" ip daddr 10.45.0.0/16 ct state established,related counter accept
  }
  chain output {
    type filter hook output priority filter; policy accept;
  }
}
table ip private_lte_nat {
  chain postrouting {
    type nat hook postrouting priority srcnat; policy accept;
    ip saddr 10.45.0.0/16 oifname "enp1s0" masquerade
  }
}
The rules intentionally do not open the subscriber WebUI, MongoDB, Diameter, PFCP, GTP-C or monitoring ports to the LAN. The WebUI is accessed through an SSH tunnel. A new network service needs its own reviewed rule. Upstream router port forwarding and UPnP are not needed for this local build.
Validate, load and make forwarding persistent
sudo nft -c -f /etc/nftables.conf
sudo nft -f /etc/nftables.conf
sudo systemctl enable nftables
echo 'net.ipv4.ip_forward=1' | sudo tee /etc/sysctl.d/90-private-lte-forwarding.conf
sudo sysctl -p /etc/sysctl.d/90-private-lte-forwarding.conf
sudo nft list ruleset
sysctl net.ipv4.ip_forward
The syntax check must succeed before loading the file. Expected forwarding value: 1. Start a second SSH session from your administrator computer to confirm it still works. Do not open the subscriber WebUI on 0.0.0.0 as a workaround if it is unreachable.
The NAT rule lets private phone addresses use the PC's router-facing address. Your home router may translate that address again. Double NAT is acceptable for this small outbound-data lab. It does not provide public inbound reachability or an operator public-address service.
The subnet blocklist covers the main local/private destinations in this example. If your management or hosted services use other address space, add those destinations before allowing subscribers. A public address assigned to a management service still needs explicit protection.
Prove the boundaries
After a phone connects, test that it can browse the Internet with Wi-Fi off. Then check that it cannot load the PC's management page, your home router's page or the eNodeB's page. Try a connection between two test subscribers if you have them; the lab's routed policy should reject it. Check the rule counters with sudo nft list table inet private_lte.
For the radio's web interface, browse to its private address from the core's local desktop or use a temporary SSH local forward from your administrator computer. Do not add a general routed bridge from the radio subnet to your home LAN. Vendor cloud management is not required just to use an external EPC, but the exact radio firmware determines which local functions remain available.
Source references: nftables reference and Ubuntu firewall guidance.
Chapter 09
Issue physical SIM cards that belong to your network
A SIM is more than a piece of plastic. It holds the identity and authentication material that lets the phone and your core recognise one another. Begin with cards supplied for private networks and keep their credentials private.
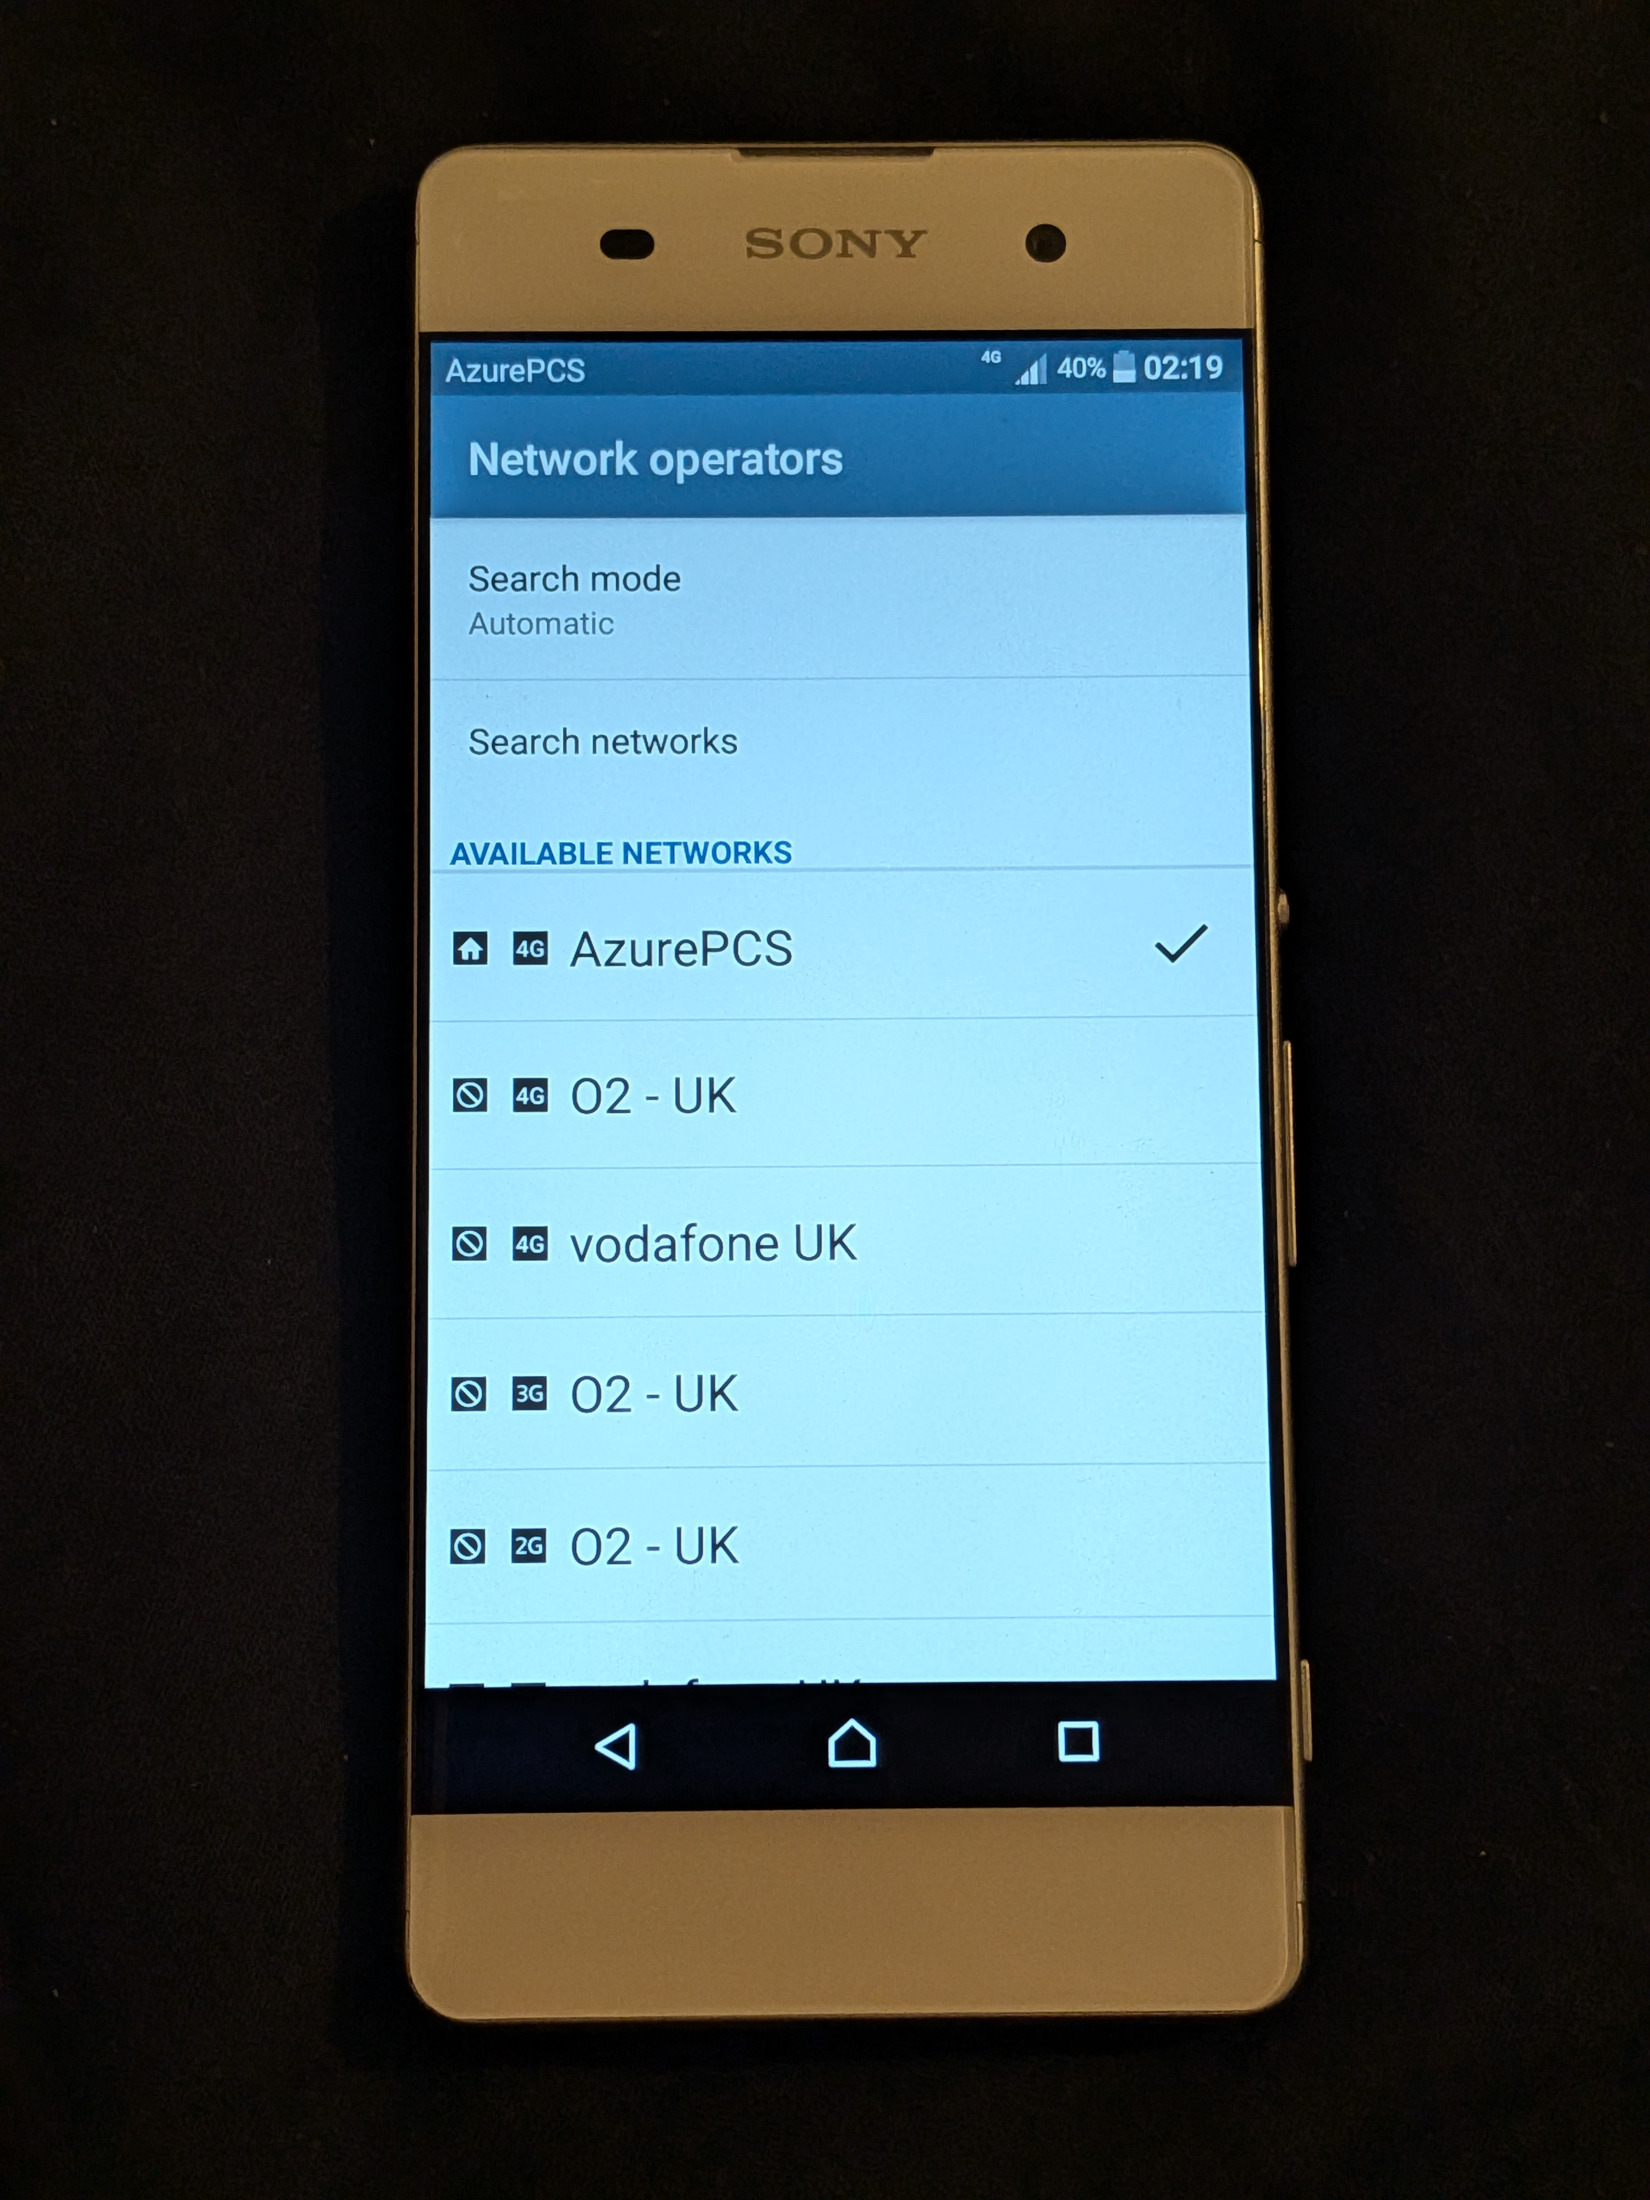
Choose the simplest first route
For a first build, buy prepersonalised USIM cards from a supplier that supports private LTE networks. Ask the supplier to provide the subscriber parameters securely and to explain how the cards are configured. You can then add those subscribers to your core without changing the card. This removes a difficult programming step while still giving you control over which subscribers your network accepts.
A normal retail SIM belongs to the operator that issued it. Possessing the plastic does not give you the authentication key or administrative rights needed to use it as one of your own subscribers. Buy a card supplied for this purpose rather than trying to adapt a public operator's SIM.
The sysmoISIM-SJA5 is one example of a programmable card intended for research and private networks. The manufacturer supplies credentials for changing identity and authentication settings. Its user manual explains that LTE needs a USIM application; a classic GSM-only SIM is insufficient. A card can contain several applications, including USIM for mobile access and ISIM for IMS identity information.
Know which values must match
| Value | Plain-language meaning | How to handle it |
|---|---|---|
| ICCID | The card's inventory identifier. | Use it to match a physical card to the supplier's record before making any change. |
| IMSI | The subscriber identity presented to the mobile network. | Enter the exact digits in the core. Keep it in text format so leading zeroes survive. |
| MCC and MNC | The country and network parts of the mobile network identity. | Use the identity appropriate to your authorised deployment and keep the MNC length consistent. |
| K, sometimes labelled Ki | A long-term subscriber authentication secret. | Keep it private and configure the correct value for that subscriber in the core. |
| OP or OPc | An input used by the selected authentication algorithm. | Confirm which form the supplier supplied and which form the core field expects. They are not interchangeable labels. |
| Authentication algorithm | The procedure used to prove the subscriber knows its secret. | Match the card and core configuration. Do not assume a test-only algorithm is appropriate for normal use. |
| PIN and PUK | Codes for user access to the card and recovery from a blocked user PIN. | Give users only the information they need and keep recovery details securely. |
| ADM1 | The card's administrative programming credential. | Keep it with protected operator records. It is not the phone's screen-lock PIN. |
| MSISDN | A number associated with the subscriber. | A locally chosen number does not become a public telephone number simply because you store it on the card. |
Make one protected record per card. Give cards distinct subscriber identities and distinct authentication secrets. Do not reuse example keys from a tutorial. These records are part of the network's security boundary, so store them separately from any material that will be published on a website.
Provision a prepersonalised card step by step
- Choose the identity and authentication arrangement with the supplier before ordering. If you already hold cards, obtain their documented configuration before deciding that they must be rewritten.
- Receive the credential file through the supplier's secure delivery method. Store the original in encrypted operator storage with restricted access.
- Check the ICCID printed on the card against its record. Label the card with a harmless inventory name rather than its authentication secret.
- In the core's subscriber interface, create the subscriber using the card's exact IMSI, authentication algorithm, K and OP or OPc. Use the field that corresponds to the supplied value.
- Add the data APN and subscriber settings required by the rest of this guide. Provision the IMS identity and service settings separately when testing native mobile voice.
- Save the subscriber entry. Do not paste the supplier's entire file into an unrelated form or publish screenshots of the authentication page.
- Power the test handset off, insert the card, power it on and configure the intended mobile data APN. Select your network according to the handset instructions.
- Check the core logs for the subscriber attaching. Confirm the handset receives a data address and can reach an allowed destination with Wi-Fi disabled.
- Record the result against the inventory name. Repeat with the second card before moving to calls or additional users.
If authentication fails, check transcription, MNC length, the chosen algorithm and the distinction between OP and OPc. Check the card's own supplied record before attempting to reprogram it. A failure does not mean the card is defective. Keeping the original supplier record unchanged makes this comparison possible.
Inspect a card without changing it
A PC/SC smart-card reader with supported USB CCID operation is a practical choice. You also need an adapter that holds the SIM securely and presents its contacts correctly. A memory-card reader that accepts microSD cards is a different device. Check support for your chosen reader and card before purchase. The LibreCellular SIM guide gives an example arrangement using a smart-card reader and a professional SIM adapter.
Use Osmocom's actual pySim project, following its installation instructions. A similarly named Python package is not necessarily the telecoms tool. Install it in an isolated environment and record the revision that you tested. The following commands assume the project's dependencies and the PC/SC service are already installed. They are inspection commands, not a programming recipe.
pcsc_scan -r
python3 pySim-shell.py -p 0
The first command lists available readers. The second starts pySim-shell using reader number zero. If more than one reader is attached, choose the number reported for the intended reader. Within the shell, a compatible card can be inspected with:
select MF
select EF.ICCID
read_binary_decoded
select ADF.USIM
select EF.IMSI
read_binary_decoded
quit
This checks inventory and subscriber identity where those files are present and readable. It does not prove that the hidden authentication key matches the core. Check that against the supplier's confidential record. The pySim-shell manual explains file selection, reader options and card-dependent permissions. Do not add an administrative credential just to make an ordinary identity inspection work.
Personalise only when you need to
Changing a card is a separate task from inspecting it. Before a write, identify the exact card model, check the manufacturer's current instructions and make a written plan for every value that will change. Use the tool's options for that specific card rather than a command copied for a different product. Read the existing identity first and compare the ICCID with the intended supplier record.
Do not guess the ADM1 credential. For sysmocom cards, repeated wrong ADM1 attempts can permanently lock administrative access. Stop after an unexpected authentication error and resolve the record mismatch with the supplier. Do not try every code in a spreadsheet until one works.
After an authorised change, verify the readable identity, update the matching core subscriber and test attachment again. Keep the old and new inventory history securely so that you know which configuration is current. Maintain sequence-number checks and the authentication protections recommended by the card and core projects. Turning off a protection to hide a mismatch can turn a useful troubleshooting clue into a lasting weakness.
When a card is lost, disable its subscriber in the core promptly and issue a replacement with new credentials. Removing a name from an inventory list does not revoke network access. When retiring cards, account for both the physical item and the matching core entry.
Further reading
Use the card manufacturer's manual for model-specific programming, the pySim-shell manual for inspection commands, and the legacy pySim provisioning documentation when maintaining a card workflow that explicitly uses pySim-prog.
Chapter 10
Add your first subscriber
Enter the exact identity and authentication material supplied with your USIM. Keep the editor reachable only through your administrator session.
Install the subscriber editor privately
This chapter is for the Open5GS branch. If you chose VectorCore, use its HSS APN, authentication and subscriber provisioning steps in the VectorCore chapter instead of installing a second subscriber database.
The Open5GS WebUI provides a form for adding SIM subscriptions. It is administration software with access to valuable secrets. Install it only after the firewall is in place. Use the current instructions from the Open5GS quickstart and a supported Node.js runtime. The following uses the NodeSource Node.js 22 repository on Ubuntu 24.04. Check the NodeSource instructions and the Open5GS WebUI release requirements if the supported runtime changes.
sudo install -d -m 755 /etc/apt/keyrings
curl -fsSL https://deb.nodesource.com/gpgkey/nodesource-repo.gpg.key   -o /tmp/nodesource.asc
sudo gpg --dearmor -o /etc/apt/keyrings/nodesource.gpg /tmp/nodesource.asc
echo 'deb [signed-by=/etc/apt/keyrings/nodesource.gpg] https://deb.nodesource.com/node_22.x nodistro main'   | sudo tee /etc/apt/sources.list.d/nodesource.list
sudo apt update
sudo apt install nodejs
node --version
npm --version
curl -fsSL https://open5gs.org/open5gs/assets/webui/install   -o /tmp/open5gs-webui-install.sh
less /tmp/open5gs-webui-install.sh
Press q to leave less. Read the script and check its version and download source before running it. It installs and starts a WebUI service and may replace an existing WebUI installation, which is why this path is for a fresh lab. Do not use it as an unreviewed production upgrade.
sudo bash /tmp/open5gs-webui-install.sh
sudo test -f /usr/lib/node_modules/open5gs/.env
sudo chown open5gs:open5gs /usr/lib/node_modules/open5gs/.env
sudo chmod 600 /usr/lib/node_modules/open5gs/.env
sudo systemctl edit open5gs-webui
Add this service override:
[Service]
Environment=HOSTNAME=127.0.0.1
User=open5gs
Group=open5gs
sudo systemctl daemon-reload
sudo systemctl restart open5gs-webui
sudo ss -ltnp | grep ':9999'
systemctl is-active open5gs-webuiExpected: the WebUI listens at 127.0.0.1:9999 and remains active as the open5gs user. The official installer supplies that account through the core packages and sets ownership of the application directory. The explicit ownership and mode commands above protect the generated session and token secrets. If the expected .env file is absent, inspect the service error before proceeding. If a dependency or build fails, read the error and use the matching release's instructions. Do not disable certificate checks, open the UI publicly or select an obsolete runtime merely to hide a build failure.
Open the UI through SSH
On your administrator computer, keep this command running, substituting your Ubuntu username and reserved management address:
ssh -N -L 9999:127.0.0.1:9999 builder@192.168.50.10Open http://127.0.0.1:9999 in that computer's browser. The local browser connection goes through your encrypted SSH session to the private editor. The official fresh installation uses the documented initial account admin with password 1423. Change that password in the account menu immediately, before entering any subscriber. Store the replacement in your password manager. An initial login that does not work is a reason to check the install and account initialisation, not to expose the database.
Add the card you actually have
| WebUI field | What to enter | What to check |
|---|---|---|
| IMSI | The complete IMSI from your own SIM supplier. | For this example it begins 99999 and uses a two-digit MNC. Preserve leading zeroes. |
| K | The supplier’s exact 128-bit key, represented as 32 hexadecimal characters. | Never use a key copied from a public tutorial for real subscribers. |
| OPc or OP | Select the type your supplier actually provided. | OP and OPc are different. Do not paste one into a field for the other. |
| AMF | The authentication management field supplied for that card/profile. | This is not the 5G core function also named AMF. |
| APN or session name | internet | Must match the phone’s APN. |
| Session type | IPv4 | The first worked build has no routed Internet IPv6. |
| QoS | Normal non-GBR data, commonly QCI 9. | Use a modest subscription bitrate initially. This is not a guaranteed radio speed. |
- Open Subscribers, choose the add button and enter the card's identity and security values.
- Add or edit the session to use
internetand IPv4. Keep the default data bearer policy appropriate for ordinary Internet data. - Save the record and confirm there is one intended subscription for that IMSI.
- Keep the supplier's original secret sheet in encrypted storage. Your public build notebook should contain a card nickname and last few identity digits, not K or OPc.
New subscriptions are normally picked up by the HSS without a restart. A changed existing subscription may need a fresh phone attachment and, for some cached profile changes, an MME restart in the private lab. Such a restart disconnects test users. Read the installed release's behaviour before using it on a service with subscribers.
Authentication errors are usually a mismatch
The phone and HSS independently calculate responses using their shared long-term material. They do not send K over the air as a normal password. A wrong IMSI, wrong K, wrong OPc type, wrong MNC length or mismatched card can prevent attachment. Repeated failures are a reason to compare the supplier sheet and HSS entry carefully. Do not generate a new random key in only one place.
For a reused SIM, sequence-number resynchronisation can also matter. Read the authentication error and use the supported resynchronisation path. Never respond by accepting all SIMs or bypassing authentication. The physical SIM and eSIM chapters explain how to obtain compatible credentials and protect them.
Checkpoint
You should have one subscriber record, a changed administrator password, a private WebUI listener and the matching card physically ready. The card's IMSI prefix, the MME PLMN and the radio PLMN must agree before the first attachment attempt.
Chapter 11
Configure the Baicells base station
Keep transmission disabled while you enter the LAN and core settings. Use the manual for the exact model and firmware in front of you.
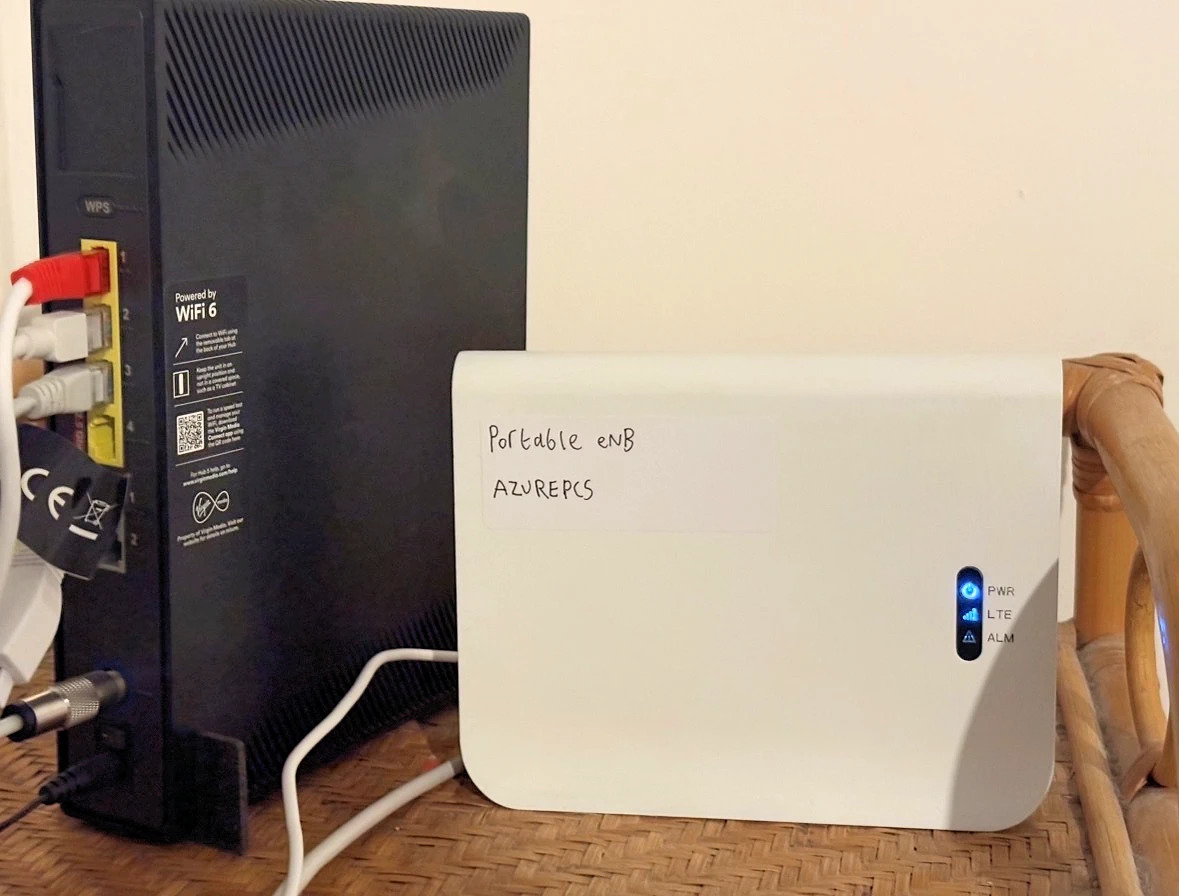
Before the first power up
Check the label, model suffix, band, power supply and PoE standard. A device that looks identical can contain a different radio board. Some Baicells firmware enables RF by default. Arrange a licensed and compliant setup or an appropriate screened test arrangement before powering equipment that may transmit. Never assume that leaving it unconfigured makes it silent.
Follow the manufacturer's antenna instructions. Do not remove an antenna or operate an external-antenna transmitter into an open connector as a way to silence it. Use correctly rated equipment and qualified help for screened or conducted testing.
- Put the radio in the indoor licensed location with suitable ventilation and safe power.
- Connect its data port through the correct PoE injector or switch to the isolated radio network.
- Identify its factory management address from the exact manual or the supplier's setup sheet. Do not guess a default password from an unrelated model.
- Give a directly connected maintenance computer a temporary compatible address if the manual requires it. Do not create a bridge to the Internet.
- Log in, disable RF in the supported menu, change the administrator password and save a backup of the original configuration privately.
Update safely and choose an external EPC
Obtain firmware from the manufacturer or the authorised supplier for that exact hardware. Record the current version and the recovery procedure before updating. A wrong image can make the radio unusable. Do the upgrade while service is stopped, then verify that RF remains disabled afterwards.
In firmware that offers a CloudEPC or EPC mode option, select the supported external or local EPC mode. The public Nova227 product information and its linked configuration manuals explain the product family, but menu names vary. Some shared manuals describe other models. Use the interface fields below as a translation worksheet, not a claim that every Baicells screen is identical.
Enter the wired network settings
These are the single-PC Open5GS addresses. For the VectorCore branch, use its separate address plan: radio 10.77.0.40, MME 10.77.0.10 and serving gateway 10.77.0.20. Do not mix the two example plans.
| Field or concept | Worked LAN setting | Reason |
|---|---|---|
| WAN or S1 address | 192.168.200.10/24, static | A stable address on the dedicated radio Ethernet. |
| Gateway | 192.168.200.1 | The Ubuntu PC on that Ethernet. No general forwarding is granted by default. |
| MME address | 192.168.200.1 | The address where Open5GS MME listens. |
| S1 signalling | SCTP 36412 | Not TCP 36412. A router/firewall must understand SCTP if present. |
| User data | UDP 2152 to the core’s advertised SGW-U address | A working MME link alone does not prove the data path. |
| IPsec | Disabled for this directly connected, trusted LAN build | No tunnel is needed just to cross a private Ethernet cable. |
| VLAN | None unless deliberately planned | Both ends must use the same tagging plan. |
| Management services | Local only, unique administrator password | No public forwarding or default credentials. |
After saving a new management address, reconnect your maintenance computer to the planned subnet and log in at the new address. A browser losing contact during an address change is expected. Write the new address down before saving it.
The baseline firewall blocks general radio Internet access. If this model needs a network time server, cloud licence check or vendor service, identify the exact requirement before adding a narrow rule. GPS or supported PTP timing may satisfy the radio timing requirement without general Internet forwarding. NTP is a separate wall-clock service.
Enter the mobile identity
| Field | Example | Check |
|---|---|---|
| MCC | 999 | Private network example only. |
| MNC | 99 | Two digits, consistent with IMSI and MME. |
| TAC | 1 decimal | If the screen expects hexadecimal, confirm the equivalent value. |
| eNodeB ID | A unique lab identifier such as 1 | Coordinate identifiers before adding another cell. |
| Cell ID | A unique local cell identifier | Follow the model’s allowed range. |
| Network selection | Your planned private PLMN | Do not broadcast Lodestar’s or another operator’s identity. |
The phone's displayed network name is not an authentication test. A device can show an old SIM service-provider name even when the PLMN is correct. Judge the connection by the actual selected PLMN, attachment result and data session.
Enter only the licensed radio settings
Copy the assigned frequency, bandwidth, indoor restrictions and power conditions from the issued licence into your settings sheet. For illustration only, a licence for a 10 MHz carrier covering 2390 to 2400 MHz corresponds to a centre of 2395 MHz and Band 40 EARFCN 39600. That example is not permission to transmit. Do not choose 20 MHz for a 10 MHz grant.
Set the permitted output using the manufacturer's interpretation of per-chain power, antenna gain and total EIRP. The spectrum chapter includes the worksheet. A radio that supports a high output does not have permission to use it.
Select the TDD uplink/downlink pattern and special subframe pattern required by the licence, coordination and equipment support. Do not select a guessed pattern from a distant operator's tutorial. Nearby TDD networks can interfere when their timing and direction disagree. Confirm GNSS/PTP lock, alarm state and the intended timing source before enabling RF.
Bring up the wired S1 connection first
Where the firmware allows it with RF disabled, check that the core connection becomes established. The MME log should show an eNodeB S1 setup, not a handset attachment yet. On the Ubuntu PC, useful checks are:
ping -c 3 192.168.200.10
sudo ss -lnp -A sctp
sudo journalctl -u open5gs-mmed -n 60 --no-pager
sudo tcpdump -ni enp2s0 'host 192.168.200.10 and sctp port 36412'
Ping only proves IP reachability. SCTP and an accepted S1 setup prove more. Press Ctrl+C to stop a capture. Signalling captures can contain subscriber identities once phones join, so keep them private. Some firmware does not establish S1 until the radio is enabled; in that case complete the settings, licence and timing checks first, then use the controlled activation in the next chapter.
Checkpoint
Save a configuration backup with its firmware version, model and date. Confirm the radio has the intended private address, external EPC settings, PLMN and TAC. Record the actual licensed RF settings separately from the example. Keep RF disabled until every item in the next chapter's activation check passes.
Chapter 12
Connect a phone and prove it works
Turn the radio on only after the licence, configuration and isolation checks pass. Then test each layer in order.
The activation check
- The licence has been issued and covers this location, indoor installation, frequency, bandwidth and EIRP.
- The radio is the correct Band 40 variant, configured for that grant, with a working supported timing source.
- The radio, MME and SIM have matching PLMN and MNC length. TAC matches the MME.
- The MME, HSS, serving gateway and packet gateway remain healthy.
- The phone's actual model variant supports Band 40 and your chosen carrier bandwidth.
- The firewall is loaded, the WebUI and database are private, and the phone pool is routed through ogstun.
- You have one known subscriber, its matching USIM and a private copy of the settings.
If these pass, enable RF using the radio's supported menu. Note the time so you can correlate events with the core log. Use the minimum appropriate authorised output for the test, and remain within the licence conditions.
Set up the test phone
- Power off the phone, insert the test USIM and power it on. For an eSIM, install the supplied profile as described in the eSIM chapter.
- Choose that SIM for mobile data. Disable data switching or automatic use of another SIM for this test.
- Turn Wi-Fi off. Leave a normal independent communications option available; do not rely on the test network for urgent calls.
- In mobile network settings, create an APN named
internet. Use APN typedefaultwhere Android requests it and protocol IPv4. Leave user name and password blank unless your subscription design explicitly requires them. - If MCC and MNC are editable, preserve 999 and the two-digit 99 for this example. Some phones fill these from the SIM automatically.
- Select LTE/4G as an allowed network mode. In manual network selection, choose your private network if automatic selection does not choose it.
- Toggle airplane mode once to request a fresh attachment. Allow time for network selection instead of rapidly changing several settings.
Menu names vary between Android versions and iPhone models. Some iPhones or carrier-controlled profiles do not expose arbitrary APN editing. A device that does not allow the needed private-network configuration may be unsuitable even when its radio band list looks correct. If Android requires data roaming for your private test identity, first disable other SIM data and understand any remaining commercial SIM costs before changing that setting.
Watch the attachment
The command below watches the Open5GS MME. For the VectorCore branch, use sudo journalctl -u vectorcore-mme -f on vc-control and the gateway checks in that chapter.
sudo journalctl -u open5gs-mmed -fLook for a phone joining, a successful authentication and a created data bearer. Exact log wording varies. Stop the view with Ctrl+C. An authentication rejection means you should return to SIM credentials and PLMN settings. An APN rejection points to the subscription and phone APN. A registered eNodeB with no phone activity points towards radio, band, SIM selection or device compatibility.
In the radio's status screen, confirm an attached UE. UE means user equipment, usually your phone. The PC should show traffic on ogstun when the phone sends data:
ip -s link show ogstun
sudo nft list table inet private_lte
sudo tcpdump -ni ogstun -c 20
That capture can contain personal traffic. Use your own test device, avoid opening private accounts during capture and do not share the capture publicly. You normally need only the interface counters for routine checks.
Test the experience in a useful order
| Test | Expected result | What it tells you |
|---|---|---|
| Confirm Wi-Fi and other-SIM fallback are off | Only the test network carries the browser session. | Avoids a false success from your normal connection. |
| Inspect mobile status | An address in 10.45.0.0/16 and the intended PLMN. | A data session and address assignment exist. |
| Open a simple HTTPS website | A valid page loads without certificate errors. | DNS, routing, NAT and application transport work together. |
| Try a second independent website | Another HTTPS page loads. | Avoids mistaking a cached page or one-site issue for success. |
| Leave the phone idle, then browse again | Traffic resumes without manually reattaching. | Idle reachability and session recovery work. |
| Load the home router, PC admin page and radio page | Connections fail from mobile data. | The subscriber is separated from management. |
| Reboot the PC and then repeat | Addresses, firewall, core and data return automatically. | The setup is persistent rather than a one-session accident. |
If you can reach an external IP in a test tool but not a name, inspect DNS. A browser pointed at an arbitrary numeric HTTPS address can fail certificate checks even when routing works, so do not use that as your only diagnosis and never ignore certificate warnings.
Measure without turning one result into a promise
Once simple browsing works, try a short speed test against a destination you are permitted to use. Record download, upload, latency, the time, handset, distance and radio signal quality. The result is shared airtime, backhaul and core behaviour at that moment. A strong signal is not a guarantee of high throughput.
RSRP describes reference-signal strength. RSRQ and SINR help describe quality and interference. Compare results in the same place before changing antenna placement or power. A phone next to the base station can behave differently from one at the edge of a building. Do not raise output beyond the licence to fix a problem that is actually timing, interference or backhaul.
Save your first known good build
Record the package versions, date, firmware, card nickname, address plan and successful tests. Save encrypted configuration and database backups as described in operations. Keep public screenshots free of IMSIs, SIM authentication material, activation QR codes, telephone numbers and private administration addresses.
You now have a useful milestone: your own SIM, radio and core provide a private LTE data session. Repeat it reliably before adding more subscribers, another site or IMS.
Chapter 13
Connect a remote site securely
The local build uses a trusted LAN and needs no IPsec. A radio at another building has a different transport problem.
When a tunnel becomes useful
A directly connected eNodeB and core on your isolated LAN can exchange S1 signalling and GTP-U data without an IPsec tunnel. Keep that path simple. A remote radio crossing ordinary broadband, shared transport or the public Internet needs an authenticated protected path. Native LTE authentication and radio encryption do not themselves protect all radio-to-core transport.
Do not make SCTP 36412 or UDP 2152 public as a shortcut. GTP and core control protocols are not an Internet-facing user API. A security gateway gives each approved site a tunnel identity and limits what it can reach.
Choose the endpoint design
Some Baicells models support IKEv2/IPsec directly. Others work better behind a site router that supplies the VPN. Verify the exact firmware's authentication methods, proposals, identity format, tunnel mode and inner addressing before choosing the gateway. An endpoint that only supports a vendor-specific cloud mode may not work with your intended external core.
A site router with a supported site-to-site VPN can also transport the eNodeB's private Ethernet subnet. WireGuard is an option between routers you control, while IKEv2 is often relevant to a radio's built-in IPsec client. Keep only one clear transport design for the first remote test. Adding both does not automatically add security and can make routing harder to diagnose.
Plan both directions before configuring a tunnel
| Question | Example answer to write down |
|---|---|
| Who initiates? | The remote site initiates through its broadband NAT to a reachable gateway. |
| What authenticates the site? | A unique site certificate or a high-entropy secret for that one site. |
| What is the inner radio subnet? | A new non-overlapping range, not the core LAN copied at every site. |
| Which addresses does the eNodeB advertise? | The S1 and GTP-U addresses reachable through the tunnel. |
| How does the core return traffic? | A route or IPsec policy for the radio’s inner address via SEGW. |
| Which services are permitted? | MME signalling and SGW-U traffic only, plus explicitly required management/timing. |
| What happens on revocation? | Revoke one site identity and verify that only that site loses access. |
| Who owns the spectrum licence? | The operator responsible for the remote radio and its installation. |
IPsec traffic selectors describe which inner addresses the tunnel protects. They are not a replacement for firewall policy. A valid tunnel must not grant access to every management system. In a separate-SEGW design, the core needs a return route via the gateway, and the gateway needs forwarding rules in both directions. NAT inside the mobile transport can break the addresses carried in signalling, so use an explicitly designed routed path.
Implement using the chosen vendor pair
- Keep a backup of the working LAN-only core. Provision a new remote site identity with a clear owner.
- Read the matching strongSwan configuration guide and swanctl reference if SEGW uses strongSwan. Use your radio's actual interoperability guide for the opposite endpoint.
- Configure unique authentication and modern mutually supported cryptography. Do not copy a public example PSK or weaken proposals until a negotiation passes without understanding why.
- Open only the gateway's required VPN transport. IKEv2 commonly uses UDP 500 and NAT traversal UDP 4500. Direct ESP support depends on the transport design. The mobile core remains private.
- Assign and route the approved inner addresses, then add narrowly scoped core and gateway firewall rules for that site.
- Establish the tunnel with RF disabled where the device supports it. Test inner reachability, then S1 setup, then the phone's full data path.
- Verify the site cannot reach another site's radio management or your administration network.
There is no universal Baicells IPsec configuration that safely applies to every model, certificate scheme and NAT arrangement. Use the actual endpoint pair's supported settings. Lodestar's production gateway provides a real example of this role, while the initial beginner LAN deliberately avoids these extra dependencies.
Test the faults that appear after the first connection
Check rekeying, a broadband interruption, router reboot, changing public address and a phone left idle. Measure packet sizes because GTP and IPsec add overhead. A tunnel that passes small pings can still lose larger packets. Preserve ICMP error delivery needed for path MTU discovery and adjust the subscriber MTU deliberately. Avoid blindly changing MTU at every layer.
Keep a tunnel inventory with site name, owner, certificate expiry, inner range, firmware and last successful test. Protect keys, revoke retired hardware and monitor repeated authentication failures. A tunnel being up is one checkpoint. The subscriber must still complete authentication, obtain an address, resolve names and pass the same isolation tests as the original LAN build.
Chapter 14
Add eSIMs through a provisioning service
An eSIM can make issuing a subscriber easier, but it still needs a real secure chip, a compatible profile and a trusted provisioning service. A homemade QR code is not enough to make an ordinary phone accept a profile.
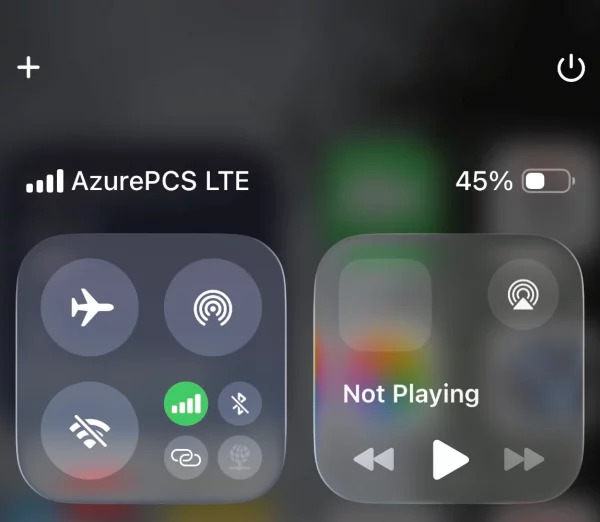
Separate the profile from the chip
The eSIM profile contains subscriber information. The eUICC is the secure physical component that stores and uses that profile. Many phones have an eUICC built in. Removable eUICCs also exist and fit into a SIM slot, but their management tools and handset compatibility need checking before purchase. An eSIM is therefore not simply a file you copy into Android or iOS storage.
The provisioning service makes the profile available for secure download. In the consumer eSIM system, that server is called an SM-DP+. The phone's Local Profile Assistant, or LPA, handles the installation process. An activation code identifies the server and the profile to retrieve. A QR code is one convenient way to present that activation information to the phone.
The Osmocom eSIM developer documentation explains these roles. Keep them separate from the 4G core. The provisioning server delivers the profile to the device; the core later authenticates the subscriber when the device joins your radio network. A successful profile download does not prove that the core subscriber entry or the radio is configured correctly.
Use the practical route for normal phones
For ordinary consumer phones, use a service that can publish your private network profiles through a GSMA accredited SM-DP+. One available example is the sysmocom eSIM Manager. It supports private or campus network provisioning, rather than only resale of a public operator's data plan. Confirm availability, account requirements, supported profile templates, charges and support terms directly with the provider.
Its user manual describes selecting a profile template, personalising subscriber parameters, publishing profiles and retrieving output and activation files. The output file supplies values such as IMSI, K and OPc for the core. The activation file supplies the download information. For normal consumer devices, select the GSMA accredited provisioning route. Its separate test route is for compatible test eUICCs.
Before buying profiles, tell the provider what you need: LTE access, the intended network identity, the handset model and firmware, and whether native IMS voice is required. Ask which template is appropriate. Also establish who may access your subscriber key material, how records are exported and deleted, and what happens if you change provider. A procurement conversation at this stage is easier than discovering after issuing profiles that an essential capability is absent.
Prepare one subscriber before issuing a batch
- Choose one test phone and record its exact regional model, operating system and eSIM support. Check that it is unlocked and can use the intended LTE band.
- Confirm the phone's eUICC is compatible with the provider's production provisioning service and chosen profile template.
- Agree the network identity and subscriber numbering plan. Keep two-digit and three-digit MNCs distinct throughout your records.
- Create a single profile using the provider's documented workflow. Use unique credentials intended for your network, rather than shared example keys.
- Retrieve the subscriber output through the provider's secure export process. Store it in your protected operator records.
- Provision the matching subscriber in the core. Check the exact IMSI, algorithm, K, OP or OPc and intended data APN.
- Complete any IMS-side subscriber and identity configuration required by your voice design.
- Retrieve the activation information and deliver it securely to the intended device owner. Treat it as a credential that can enable installation.
- Install the profile on the test phone, then test the network before producing a larger batch.
Keep an inventory relationship between the profile's ICCID, its IMSI, the device owner and its current status. Do not use a publicly accessible spreadsheet for that relationship. Give users a clear subscriber name so they can distinguish your network from their everyday mobile subscription when choosing which SIM handles data or calls.
Install and test the profile
Connect the phone to a working internet connection, commonly Wi-Fi, so it can reach the provisioning service. Open the phone's eSIM or mobile-plan settings and follow the manufacturer's process for scanning the activation code or entering its details. Keep the activation code visible on a separate trusted screen if the phone cannot scan an image displayed on itself.
After installation, check that the intended profile is enabled. On a dual-SIM phone, explicitly select the private profile for the mobile data test. Temporarily disabling the other SIM can make diagnosis easier. Turn off Wi-Fi for the actual mobile network data test so that a working Wi-Fi connection cannot hide a failed LTE session.
First confirm that the profile installed. Next confirm that the phone can select your network. Then confirm core authentication, a data address and access to an allowed service. Finally test IMS registration and calls if those are part of the build. These are separate checkpoints with different failure causes.
Keep a small results sheet using inventory names. Include the installation date, software version and each checkpoint's result. Record whether a reboot or switching airplane mode on and off restores service. Test a second device only after the first gives a repeatable result. A controlled sequence makes it much easier to identify whether a later failure comes from the profile, the phone or a network change.
Understand why a laboratory eSIM server is different
Osmocom's osmo-smdpp is explicitly a proof-of-concept implementation for research and development. Its documentation says regular production eUICCs require the appropriate accredited server certificates. The test implementation can be used with eUICCs that trust the matching GSMA SGP.26 test certificates. That is a specialised lab arrangement, not a shortcut for provisioning every ordinary phone.
Do not put a test certificate setup into the secure-network instructions as if it had the same trust properties as a production provisioning service. The private keys associated with the standard test certificate arrangement are public. A test download working in a laboratory establishes that the experiment works; it does not establish a suitable production security design.
A removable test eUICC can be useful for learning how profile installation works. Keep that experiment separate from profiles issued to people who expect their access credentials to remain private. Label test cards clearly, keep them out of normal distribution and avoid relying on shared test credentials for live subscribers.
Troubleshoot at the correct boundary
| Where it fails | What to check first |
|---|---|
| The phone will not install the profile. | Internet reachability, activation details, whether the profile is already consumed or restricted, eUICC compatibility and the production versus test provisioning route. |
| The profile installs but no network appears. | The radio's authorised operating state, timing, frequency, band support, coverage and broadcast network identity. |
| The phone finds the network but authentication fails. | The core subscriber entry, IMSI, authentication algorithm, matching secret values and relevant core logs. |
| The phone attaches but has no usable data. | The data APN, subscriber service settings, address allocation, routing, firewall rules and DNS. |
| Data works but calls fail. | The handset's IMS policy and compatibility, IMS provisioning, P-CSCF discovery and voice service logs. |
The Open5GS VoLTE study guide illustrates that handset VoLTE enablement and IMS configuration need their own work. Treat any published handset compatibility examples as test reports for a particular setup, rather than a promise that every firmware version will work.
Operate profiles securely after installation
Keep subscriber output files and activation files out of website uploads, support screenshots, public repositories and ordinary group chats. If you need an instructional screenshot, use a clearly fictional activation example. Do not photograph a real activation QR code for this guide.
Plan what happens when a phone is lost, replaced or sold. Disabling the subscriber in the core prevents further access through that subscriber account. Deleting a profile from one phone is a different action and should not be your only revocation process. Ask the provider how profile re-downloads, replacements and transfer restrictions work before promising users that moving to a new phone will be automatic.
Keep encrypted backups of the information needed to rebuild the core subscriber database. Limit operator access and record administrative changes. Review provider retention and deletion controls after a successful export, without deleting the only copy of records you still need to operate the network.
Continue to maintain the normal network security controls after choosing eSIMs. The delivery format does not replace firewall policy, software updates, secure management access or protected backhaul. Its practical benefit is a different way to distribute subscriber credentials, while the radio and core still need the same careful commissioning.
Further reading
Read the sysmocom eSIM Manager manual for its service workflow, the Osmocom SM-DP+ explanation for the architecture, and the osmo-smdpp limitations before attempting a separate laboratory provisioning experiment.
Chapter 15
Add voice calls and text messages
An LTE data connection is the foundation. Voice over LTE adds a separate service called IMS, the IP Multimedia Subsystem. Work through this chapter after two test SIMs can attach to your chosen Open5GS or VectorCore build over the private LAN and exchange ordinary data. This is an advanced implementation roadmap with checkpoints, because handset support, radio behaviour and the chosen IMS software must be validated together.
Understand what a telephone call needs
The mobile core authenticates a SIM and gives the phone a data connection. IMS authenticates a telephone identity and controls calls. SIP, the Session Initiation Protocol, carries instructions such as register, ring, answer and hang up. RTP carries the sound. A phone can have excellent LTE data while its telephone application cannot make a call.
Prepare two handsets, two separately provisioned test subscriptions, a working radio and core, private DNS, reliable time synchronisation and a separate management connection. Keep another working telephone available. A successful call between your two test phones demonstrates a local service; it does not establish public telephone connectivity or emergency calling capability.
Use a written test sheet. Record each handset model, regional variant, operating system, modem firmware, SIM type and carrier configuration. These details make a repeatable result more useful than a photograph of a VoLTE icon.
Check handset support before buying an IMS stack
A handset needs Band 40 support for the chosen radio, plus an IMS implementation that will operate with your authorised network identity and SIM profile. An unlocked handset is not a guarantee of either. Manufacturer and carrier settings can determine whether the phone creates an IMS connection, attempts registration or offers particular codecs. Android provides carrier configuration mechanisms specifically including VoLTE and IMS settings. See the Android carrier configuration documentation.
Ask the handset or test SIM supplier for a documented, supported combination. Begin with two matching handsets whose IMS behaviour is known. Do not turn firmware replacement, root access or an unexplained modem patch into a beginner prerequisite. If a phone never sends an IMS registration request, investigate its support and provisioning before changing your call server.
Make a private identity worksheet
| Item | Meaning | What must agree |
|---|---|---|
| IMSI | The subscription identity stored in the SIM profile | SIM and LTE subscriber database |
| Authentication material | The secret values used to prove subscription ownership | SIM supplier records and the appropriate authentication backend |
| IMPI | The IMS private user identity | ISIM or supported handset derivation, IMS authentication records and realm |
| IMPU | An IMS public identity, usually a SIP URI | Handset profile, IMS subscriber records and service profile |
| Telephone identity | A number represented by a telephone URI where the service uses one | Dial plan, subscriber association and any authorised external routing |
An ISIM is an application on a UICC or eUICC profile, not a different shape of plastic card. Its files can hold the private identity, public identities and home domain. A physical test SIM and an eSIM profile both need consistent provisioning. Some handset arrangements derive IMS identities from a USIM; support depends on the implementation. The Osmocom pySim filesystem reference describes the ISIM identity files.
Keep the worksheet encrypted and restrict access. Never place authentication keys, SIM administration codes, eSIM activation codes or subscriber exports in website examples. Allocate distinct subscriptions to the two test phones. Reusing one identity in both phones makes registration and delivery faults much harder to understand.
Choose a coherent public implementation
The public Open5GS VoLTE tutorial is a useful architecture reference. It combines an LTE core with Kamailio IMS and an IMS capable HSS. Its original examples use older operating systems, software and handset workarounds, so select and document current compatible releases before installation. Do not copy its historical password, root login or sequence counter shortcuts into a new network. Read the Open5GS VoLTE tutorial alongside the documentation for the versions you actually install.
The LTE HSS interface and the IMS HSS interface serve different purposes. A core that can authenticate LTE attachment over S6a does not automatically supply the IMS Cx functions that your call servers require. Confirm that the selected IMS subscriber backend supplies authentication vectors, registration information and service profiles through the interfaces expected by your Kamailio version. Record which component owns each subscription and how updates remain consistent.
Keep a version manifest and a backup of your own configuration before adding IMS. A collection of configuration files from unrelated tutorials is not a compatible release.
VectorCore is also publicly available. Its HSS repository documents Cx subscriber and authentication exchanges and Gx and Rx policy integration. If you choose VectorCore, use its documented version and provisioning model instead of assuming that another tutorial's HSS database or commands apply unchanged. Public source availability establishes what you can inspect and build; it does not establish compatibility with every IMS configuration or handset.
Name the IMS service correctly
IMS uses a home domain and DNS records. For an illustrative private network identity with MCC 999 and the two digit MNC 99, the conventional domain is ims.mnc099.mcc999.3gppnetwork.org. The MNC 99 is padded to 099 in this domain. That padding does not turn the SIM's two digit MNC into a different three digit MNC. Keep the IMSI prefix 99999, the SIM's two digit MNC length and the core's 999/99 identity consistent; only the domain label uses the padded form. Use the identity authorised for your deployment; this example does not allocate one.
Put the IMS domain, P-CSCF name, I-CSCF name, S-CSCF name and required address and service records in the private DNS design. Check them from the networks that will use them, not only from the DNS server itself. The naming and identity rules are defined in 3GPP TS 23.003 published by ETSI.
For the illustrative domain, dig +short pcscf.ims.mnc099.mcc999.3gppnetwork.org should return your lab's intended P-CSCF address through its configured resolver. Then validate any NAPTR and SRV records required by your chosen discovery method. A correct address record alone does not prove the complete discovery chain.
Create the IMS data connection and discover the P-CSCF
Give the subscription an IMS APN in addition to its normal data service, following the selected core's configuration model. Define its address pool, route, DNS behaviour and policy. An APN is a named service a phone requests from the core, not a Wi-Fi network name. Use a separate, non-overlapping address pool and allow it to reach the IMS services it needs.
Configure P-CSCF discovery in the gateway, commonly through Protocol Configuration Options returned when the IMS connection is created. Confirm that the handset requests and receives an address it can actually route to. Setting the P-CSCF address in a server file does not guarantee the phone receives it. Keep the IP family consistent across the handset connection, discovery information, DNS and IMS listeners. The Deutsche Telekom voice service guidelines explain IMS APN, PCO discovery and bearer expectations.
Your checkpoint is an established IMS connection with a reachable P-CSCF. If ordinary data works but this connection fails, check APN authorisation, address allocation and routes before investigating SIP authentication.
Give the three Kamailio roles separate jobs
- P-CSCF: the phone's first IMS contact. Configure its advertised identity, trusted core routes, registration handling and supported access security. Kamailio provides separate registrar and IPsec modules for this role.
- I-CSCF: the entry and selection function that consults the IMS subscriber system to locate or select the serving call server.
- S-CSCF: the serving function that authenticates and registers IMS identities, applies service profiles and routes calls to their destination or application server.
These can be separate processes on one lab machine. Give each process its own configuration, listener, runtime directory and service unit. Distinct roles do not require three physical computers. Start with local subscriber calls and explicit trust relationships.
Use the official P-CSCF registrar, I-CSCF, S-CSCF registrar and IMS IPsec documentation for the selected release. Use that release's configuration validation mode on every role before starting it. A file that parses successfully still needs registration and call tests.
Your main radio-to-core connection stays on the private LAN and does not require an IPsec security gateway. IMS access security between a handset and P-CSCF is a different mechanism from radio backhaul IPsec. Configure the security supported and required by the chosen IMS and handset profile; removing an optional remote backhaul tunnel is not a reason to disable IMS authentication or integrity protection.
Prove registration before trying a call
Check DNS, peer identities, realms, routes and time first. Then check that the IMS Diameter peers establish the expected connection and exchange the required applications. Cx carries IMS subscriber and authentication interactions. Rx links IMS policy requests to the policy system. A connected Diameter transport does not prove that the required application is accepted or that a subscriber exists.
Observe one controlled registration attempt. An initial SIP authentication challenge, often a 401 response, can be normal. It should be followed by the handset's authenticated request and a successful registration response. Repeating challenges, authentication failures and timeouts indicate different problems. Inspect the relevant configuration and a private, narrowly scoped trace to distinguish them.
Check subscriber identity, realm, authentication algorithm and synchronisation through the supported tools. Preserve sequence number protection and resolve synchronisation failures properly. Do not solve an authentication error by disabling checks or letting untrusted callers assert another user's identity. Redact identities, addresses and authentication material before sharing a trace.
Connect the sound path and the call policy
RTPengine is a media relay. Kamailio can ask it to manage the media information in session descriptions so the endpoints use an appropriate reachable relay path. Its control interface belongs on a trusted local or management network. Its media port range needs explicit routing and firewall rules in both directions. SIP registration and ringing can succeed while audio fails because media follows a different path. Use the Kamailio RTPengine module documentation and Sipwise RTPengine project for matching control and daemon versions.
Start with a codec supported by both test phones and the complete media path. Transcoding is a separate capability that needs deliberate codec and resource planning. FreeSWITCH can provide applications such as announcements, voicemail or an echo service where you configure them. It is optional for this architecture and does not replace IMS SIM authentication. See the FreeSWITCH manual.
For a standards based VoLTE service, coordinate policy and bearer creation across IMS, the core and the radio. IMS signalling normally uses QCI 5, while conversational voice uses a dedicated bearer with QCI 1. Confirm actual bearer creation during a call. A priority setting in a single web interface cannot establish this behaviour. The GSMA IR.92 profile describes these bearer expectations, and Kamailio's IMS QoS module documents its Rx integration.
Treat SMS as its own service
SMS can travel through IMS, or through supported LTE signalling and an associated messaging gateway. These are separate integration paths. Successful voice registration does not automatically provide either one. SMS over IMS needs the appropriate SMS gateway behaviour and routing for the encoded short message. An ordinary chat message sent by SIP is not sufficient evidence of working telephone SMS. The standards scope is described by 3GPP TS 24.341, Support of SMS over IP networks.
Choose the path your handset and software support. Build a local test between your own subscriptions before connecting any external carrier. Validate sender authorisation, message encoding, delivery reports, retries and duplicate suppression. Test a short plain message, a long message split into parts, non-ASCII text and delivery to a phone that is temporarily offline. A gateway accepting a request is not proof that a handset received it.
Use a test matrix and know where to stop
| Test | Evidence to keep privately | First area to inspect on failure |
|---|---|---|
| Both phones register | Successful registration for each distinct subscription | Handset profile, discovery, identities and IMS authentication |
| A calls B and B calls A | Ringing, answer and clean release in each direction | Dial plan, subscriber location and service routes |
| Two way audio for several minutes | Audible speech both ways and stable call | RTP routing, firewall, codecs and bearer policy |
| Call after idle and after airplane mode | Incoming calls reach the phone after re-registration | Registration expiry, paging and stale state |
| SMS in both directions | Actual handset receipt including long and non-ASCII text | SMS transport, encoding and identity mapping |
| Unsupported and unauthorised requests | Requests rejected without routing or sender impersonation | Trust boundaries and authentication rules |
Keep external telephone routing disabled until local calls and access controls pass. External numbers require a suitable provider, authorised number use, fraud controls and a reviewed public service design. Use test destinations you control. Do not call emergency numbers to test the lab.
The exit condition for this chapter is reproducible local voice and messaging on the documented devices, with failures and unsupported features recorded. If your handset combination cannot support IMS, preserve the working LTE data network and choose a documented compatible device before expanding the project.
Chapter 16
Keep the network secure and reliable
A network is useful when it still works after a reboot, a power cut and a change made several weeks later.
Create a private build record
Keep an inventory of the PC, radio, switch, power supply, serial numbers, firmware, package versions, licence expiry, site address, antenna settings and named people responsible. Separate public learning notes from private operational information. The latter includes subscriber identities, credentials, VPN keys, activation codes and administration addresses.
Record one change at a time with a reason, test and rollback plan. A useful record says what the symptom was, what changed, what proved the result and which backup contains the previous version. Screenshots alone can miss a hidden setting, so keep supported configuration exports too.
Back up the things that let you rebuild
| Item | Why it matters | Handling |
|---|---|---|
| Open5GS or VectorCore configuration | Addresses, PLMN, gateway peers, policy and service layout. | Encrypted backup with limited administrator access. |
| Subscriber database | The network cannot authenticate the intended SIMs without the matching records. | Treat as long-term authentication secrets and personal data. |
| SIM supplier records | Needed to identify and provision cards correctly. | Password manager or encrypted file store, never a public spreadsheet. |
| Radio configuration and firmware record | Lets you restore the eNodeB after a reset or replacement. | Include model suffix and licence-compatible RF settings. |
| Firewall, Netplan and service units | Rebuilds routing and isolation after disk failure. | Keep a dated working copy and test it. |
| Site VPN identity and revocation record | Controls which remote sites may connect. | Restrict keys and document how one site is revoked. |
For the small Open5GS lab, MongoDB's official tools provide a logical backup. A coherent backup is easiest during a planned quiet window with subscriber editing stopped. This example saves secrets locally in a root-only directory; encrypt the archive before moving it off the PC.
sudo install -d -m 700 /root/private-lte-backups/database
sudo mongodump --db open5gs   --archive=/root/private-lte-backups/database/open5gs.archive --gzip
sudo chmod 600 /root/private-lte-backups/database/open5gs.archive
sudo cp -a /etc/nftables.conf /root/private-lte-backups/nftables-working.conf
sudo cp -a /etc/open5gs /root/private-lte-backups/open5gs-working
The mongodump documentation explains backup limitations, authentication and consistency for larger systems. A successful backup command is not proof of a usable restore. Restore onto an isolated spare system, check the expected record count privately and prevent that spare from transmitting or advertising the same live network accidentally.
Watch health without collecting everything
Start with service status, CPU and memory, free disk space, correct time, radio timing alarms, eNodeB S1 status and a simple test phone. Add measurements for attach failures, established sessions, packet loss, tunnel health and certificate expiry as the network grows. A monitor should tell you something actionable, such as a service that stopped or a licence renewal that is due.
systemctl --failed
systemctl is-active mongod open5gs-mmed open5gs-hssd open5gs-smfd open5gs-upfd
df -h
free -h
timedatectl status
ip -s link show ogstun
sudo journalctl -u open5gs-mmed --since '15 minutes ago' --no-pager
Use the relevant VectorCore service names if you selected that branch. Logs can contain IMSIs, session addresses, telephone numbers and sensitive payload details. Retain only what you need, rotate it, restrict access and remove private data before asking for help. Subscriber packet captures should be exceptional, targeted and lawful.
Update with a route back
- Read the release notes for the OS, core, database and radio firmware. Check configuration migrations and runtime requirements.
- Make a backup and verify that you know how to restore it. Keep the previous working package/build information.
- Use a maintenance window and tell affected users through your normal service process.
- Change one layer, restart only what is needed and rerun attachment, data, isolation and recovery tests.
- If the result fails, use the documented rollback rather than making several unrelated changes.
Automatic OS security updates can be useful, but a core, database major version or radio firmware upgrade deserves deliberate compatibility testing. Keep a supported runtime. Do not leave an old Go or Node version forever simply because it built once.
Plan for power and physical faults
Include the PC, switch, PoE injector, radio, router and upstream modem in your power plan. A UPS protecting only the server will not keep a radio online when its injector loses power. Measure real power draw and test shutdown and restart behaviour. Keep spare Ethernet cables and a correctly specified power supply.
Check ventilation, mounting, moisture and cable strain. Outdoor installations bring additional permissions, electrical and installation requirements and are outside the ordinary indoor 2.3 GHz Shared Access build described here. Do not turn an indoor tutorial into an outdoor mast by increasing power or moving an antenna through a wall.
Before offering service to other people
A working lab is a learning milestone. Running a service for the public also requires appropriate spectrum authority, a dependable operating plan, privacy arrangements, support, security response and the applicable communications obligations. Public voice and numbering add further requirements, including emergency communications design and tested supplier arrangements.
Review the current Ofcom General Conditions and the ICO guidance for organisations for the service you intend to provide. The exact duties depend on that service. Keep an experimental network clearly described and do not advertise emergency calling or nationwide roaming because ordinary data browsing works.
A useful handover test
Ask another trusted administrator to rebuild or explain the system using your private documentation. Can they find the licence, identify each cable, restore the core, add an authorised test SIM, revoke a lost device and tell whether the fault is radio, authentication or Internet routing? Improve the instructions where they get stuck. That is how a one-person experiment becomes maintainable knowledge.
Chapter 17
Find faults one layer at a time
Start with the first missing checkpoint. Keep the last working configuration and change one thing at a time.
Use a short evidence record
Write down the exact symptom, the time, what last worked, the last change and the first failed test. State whether the radio is visible, S1 is established, authentication succeeds, a phone IP is assigned and a website loads. This is much more useful than saying that 4G does not work.
Use your own device and a planned test account. Keep captures and full logs private. Share a minimal redacted error, software version and diagram when asking for help. Never paste K, OPc, ADM, passwords, eSIM activation codes or private key files.
The phone cannot find the network
- Check that you are legally permitted to transmit now and that RF is enabled only under that authority.
- Check the radio's power, alarms, timing lock, configured frequency, Band 40 variant and bandwidth.
- Check the handset's exact regional model supports that band. A marketing name can cover several different modem variants.
- Check network mode and manual selection. A SIM or handset policy can hide or reject a private PLMN.
- Move to a sensible test position inside the authorised area. Do not change licensed power limits to chase coverage.
Core NAT changes cannot repair an invisible RF carrier. Start with the radio and handset compatibility.
The radio cannot establish S1
- From the PC, ping the planned eNodeB address and inspect the interface and cable.
- Check MME bind address and the radio's MME destination. 127.0.0.2 is local to the PC and is not reachable as a core address from a separate radio.
- Use
sudo ss -lnp -A sctpto check the listener. Confirm SCTP 36412 is allowed from the actual radio address. - Inspect the MME log for a rejected S1 setup, PLMN mismatch or configuration error.
- On a remote design, check the tunnel, traffic selectors and return route. The LAN-only build has no IPsec dependency.
SCTP is a distinct transport protocol. Opening a TCP rule with the same port number does not open SCTP.
The network is visible but the SIM is rejected
Compare the full IMSI against the inserted card. Verify K, OPc versus OP, AMF, PLMN and two-digit versus three-digit MNC length. Inspect the exact rejection cause. Check whether a previous failed selection left the network in the handset's forbidden list. A controlled airplane-mode cycle, reinsertion or documented SIM selection procedure may be needed after correcting the cause.
Sequence-number resynchronisation is separate from changing keys. If the log reports an authentication sync failure, use the core's supported resynchronisation procedure. Never guess ADM codes, bypass authentication or edit random database fields to make a rejection disappear.
The phone attaches but has no Internet
| Check | Command or observation | Likely direction |
|---|---|---|
| APN and session | Phone APN internet, HSS session internet and IPv4. | Subscription/session selection if rejected. |
| Subscriber interface | ip -br address show ogstun | Missing TUN or pool route if absent. |
| Forwarding | sysctl net.ipv4.ip_forward | Must be 1 after firewall setup. |
| Radio user-plane traffic | A short capture on radio interface UDP 2152. | GTP-U address, firewall or route if absent. |
| Decapsulated traffic | Interface counters on ogstun. | SGW/PGW peer setup if only outer traffic exists. |
| NAT and reply | Counters in nftables and router connectivity. | Forwarding/NAT/return path if one direction only. |
| Name resolution | Compare DNS failure with IP reachability using a diagnostic tool. | Resolver choice, reachability or phone DNS settings. |
The MME control path and GTP-U data path are different. S1 being green is not proof that subscriber packets reach the packet gateway. In the Open5GS local LTE design the eNodeB reaches SGW-U; in the mixed VectorCore design the configured serving and packet gateway peers must agree as well.
Small pages work, large transfers fail
Investigate MTU and packet loss. GTP adds overhead, and an additional site tunnel adds more. Check whether needed ICMP error messages return, whether the phone was assigned the intended inner MTU and whether the same transfer works locally. If TCP works but UDP media fails, examine the media path and firewall instead of only adjusting TCP MSS.
Do not change every interface MTU at once. Record one controlled change and test it. A successful ping with its default small payload is weak evidence about the largest packets the whole route can carry.
The connection stops after being idle
Record how long the phone was idle and whether it recovers with airplane mode. Check MME paging and service-request handling, radio S1 stability, gateway session lifetime and any remote tunnel rekey or NAT timeout. Compare a phone on the local LAN radio with one on a remote site. This helps separate transport problems from core idle-state behaviour.
Restarting every process destroys useful evidence and disconnects other users. Read the service status and targeted logs first. Reproduce the fault with a test SIM before changing production timers.
Data works but calls or SMS fail
Confirm the separate IMS APN and P-CSCF discovery before looking for SIP registration. Check the handset's carrier profile and ISIM identities. A registration failure belongs to a different layer from a call that rings but has one-way audio. For audio, trace SDP and RTP through the media relay. For SMS, identify whether the intended path is IMS SMS or signalling-based SMS; these need different components.
Use the voice chapter's test matrix. Do not assume a data-capable Band 40 phone can provide native VoLTE on any private PLMN. An ordinary SIP app tests an Internet voice application and does not prove the phone's native IMS stack works.
When to stop changing things
If the new configuration is less understandable than the last working one, restore the saved version and reproduce the first failure. Keep the transmitter disabled during uncertain RF changes. Ask for help with a small diagram, exact versions, the expected result and a redacted error from one layer. You do not need to know all the answers to produce a good fault report.
Chapter 18
What the real Lodestar network teaches us
Lodestar's running network provides context for this guide. A read-only inspection on 1 November 2026 checked the configured segw, lsn-core and ims-edge hosts. This chapter publishes a sanitised view of roles and software. Running services were observed, but the inspection did not make test calls, attach a test handset or prove every possible traffic path.
Three machines, three areas of responsibility
A useful way to understand the deployment is to follow a phone's request. In the wider production design, gateway transport protection, mobile subscription authentication and IMS telephone services have separate responsibilities. The mobile core authenticates the subscription and builds connectivity, while IMS provides telephone registration and call control. The real network separates these responsibilities across a security gateway, a core host and an IMS edge host.
This describes responsibilities rather than a complete wiring diagram. A host can run several functions, and a process can be active without carrying the currently selected user traffic. The public Lodestar story describes the wider project. Use the beginner build in this guide as a public learning path, with the production system as an example of how responsibilities can grow.
| Host role | Observed functions | Lesson for a first build |
|---|---|---|
| Security gateway | IPsec software, a WireGuard interface and separate management networking | Optional for a remote site crossing an untrusted network; a LAN build does not need this gateway |
| Mobile core | Mobile authentication, mobility and gateway services, plus DNS and monitoring | Prove attachment and data routing before adding telephone services |
| IMS edge | IMS call control, media relay, messaging and application services | Add voice and SMS as separate tested layers |
The worked beginner topology keeps the radio and core together on an isolated private Ethernet LAN. It does not require a security gateway or backhaul IPsec tunnel. Separate production hosts explain how Lodestar is organised, not a minimum shopping list for your own first network.
The security gateway
The security gateway was running Ubuntu 22.04.5 LTS. The inspection found an active Lodestar charon service, strongSwan 5.9.5 packages, swanctl tooling, a WireGuard interface and a dedicated management VLAN. Provisioning and metadata services associated with the gateway were also active.
charon is strongSwan's IKE daemon. In a design using IPsec radio backhaul, IKE negotiates the protected association between the authorised peers. WireGuard and a management VLAN can support separate administrative access. The active software and interface inventory verifies the presence of these building blocks. It does not by itself establish which tunnels carried traffic at the moment of inspection or prove every firewall rule.
For the LAN-only build, keep the radio link on the isolated private cable or controlled VLAN and do not add an IPsec gateway merely to copy the production layout. If a future radio site crosses an untrusted network, plan transport security, peer authentication and management access for that changed topology. Any future tunnel needs its own keys, certificates or other selected peer credentials. An existing operator's credentials are neither required nor suitable. For that remote design, write down what the radio may reach through its tunnel and what an administrator may reach through the management path.
The mobile core
The core host was running Ubuntu 24.04.5 LTS. Active VectorCore services included MME, HSS, SGW control and SGW user plane roles. Open5GS SMF and UPF processes were also active, alongside NRF and SCP services. Additional gateway canary services were present. Because multiple gateway implementations were running, a service list alone cannot establish the exact live user plane route.
In plain language, the MME coordinates LTE attachment and mobility, the HSS holds subscription and authentication information, and the gateway functions organise and carry subscriber packets. The published Lodestar story describes a VectorCore serving gateway combined with Open5GS packet gateway functions. That documented design is useful context; the read-only inspection was not an end-to-end verification of it.
The host also had primary and secondary DNS proxy services, MongoDB, BIRD routing software, Prometheus, Grafana and GenieACS active. These show that operating the network involves name resolution, routing, measurement and device management as well as the mobile protocols. Their presence is not a recommendation to install every one in a first lab. Add supporting services when you can explain their purpose, access rules and recovery procedure.
The IMS edge
The IMS edge was running Ubuntu 22.04.5 LTS with Kamailio 6.1.1. Separate active services provided P-CSCF, I-CSCF, S-CSCF and SMSC application roles. Configuration structure confirmed P-CSCF registrar and IMS IPsec modules, Diameter CDP components, and S-CSCF authentication, registrar and charging modules. The P-CSCF configuration contained Rx policy function calls. These are verified configuration observations, not proof that every feature was exercised by a handset.
Diameter configuration showed IMS Cx application identifiers for I-CSCF and S-CSCF and an Rx application identifier for P-CSCF. The S-CSCF configuration also contained RTPengine offer, answer and session management calls. RTPengine 12.5.1.56 was active as the media relay.
The running FreeSWITCH executable reported version 1.11.3. This version was checked against the actual service executable, since the default shell executable was a different version. The distinction matters when troubleshooting: an installed command's version does not always identify the software serving traffic.
PostgreSQL 14, dnsmasq and Caddy were active, together with monitoring and host protection services. The network interfaces included a physical Ethernet interface and a VLAN interface. No host addresses, routing details, credentials or subscriber data are needed to understand these roles.
Messaging and customer services add more moving parts
The IMS host had active services labelled for SMS over LTE NAS, an IMS and carrier SMS adapter, durable SMS transport APIs and workers, and a multipart carrier submission worker. Subscriber provisioning, voice account, rating, telemetry and telephone application services were also active. This verifies that the production host has a wider application layer than the basic IMS call control processes.
The labels and configuration inventory do not prove the final delivery route for an individual message. They also do not mean that a fresh Kamailio installation contains Lodestar's custom applications. Treat message submission, storage, retry, carrier delivery and handset receipt as distinct stages when designing your own service.
A small private lab can begin with local subscriptions and explicit test destinations. Customer registration, prepaid rating, billing, external carrier access and account recovery should each have their own design and tests before being added. Every additional service needs a clear owner for its data, an authentication boundary and an observable failure state.
Choose Open5GS or public VectorCore
Both Open5GS and VectorCore have public source. This guide offers an Open5GS package-based path and a separate VectorCore source-build path. Choose one core path for the initial lab and follow its configuration and subscriber model consistently. Do not start competing MME or gateway services on the same listeners and assume the phone will select the intended one.
The public VectorCore organisation includes mobile core and service repositories, including MME, HSS and SMSC projects. Their documentation is the starting point for inspecting and building published VectorCore software. The VectorCore HSS documentation describes LTE and IMS interfaces including S6a, Cx, Gx and Rx. This makes it a real public option to evaluate, with its own build, database and configuration requirements.
The production SSH inspection did not prove that each running binary exactly matches a particular public commit, release or example configuration. Local service units and integration applications also form part of a deployed system. Record the commits you build, verify configuration against those commits and distinguish an upstream capability from a feature you have tested in your own deployment.
You can learn the essential boundaries with one Ubuntu PC holding separate lab processes or virtual machines if it has adequate resources. Keep the core and radio on the private LAN for the main build. No remote backhaul tunnel is required for that arrangement. Add physical separation, a remote gateway or redundancy when your topology, recovery needs or capacity justify it.
The first milestone is an authorised radio, a test SIM that authenticates, a phone that receives an address and controlled data connectivity that survives a restart. Add a second subscription, protected administration, backup and recovery, and measured service behaviour. Voice and messaging follow that foundation with either core choice.
What this inspection does and does not establish
Verified facts in this chapter came from operating system information, active service inventory, actual executable versions and selected configuration structure. The inspection was read-only. It did not restart services, alter firewall rules, change subscriber records or place calls. Public documentation supplied the explanation of each standard role.
Statements about the intended flow of a complete deployment are architectural explanations. Where multiple implementations were active, the selected production path remains unverified by this inspection. Module presence establishes that a capability is configured or available; a controlled test is still needed to prove its behaviour.
The production service names and version snapshot help explain Lodestar's story on the inspection date. They are not a security certification, a compatibility guarantee for arbitrary phones or a promise that the public tutorial recreates every service. Keep your own evidence sheet with software versions, handset details, test results and the date of each successful recovery exercise.